Honeywell RDWL917AX2000 Portable Wireless Doorbell User Guide
Honeywell RDWL917AX2000 Portable Wireless Doorbell Installation and Operation Guide

Read before installing
Preparation
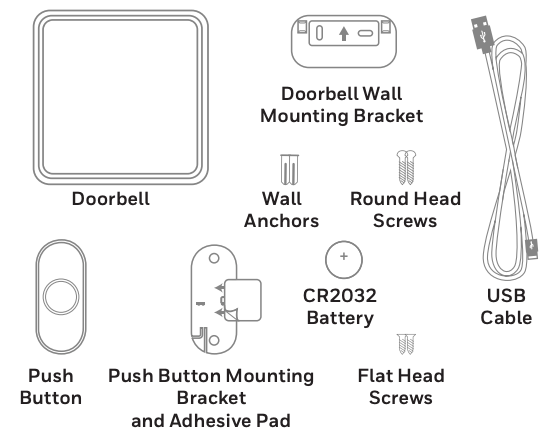
In the box you will find

To install you will need

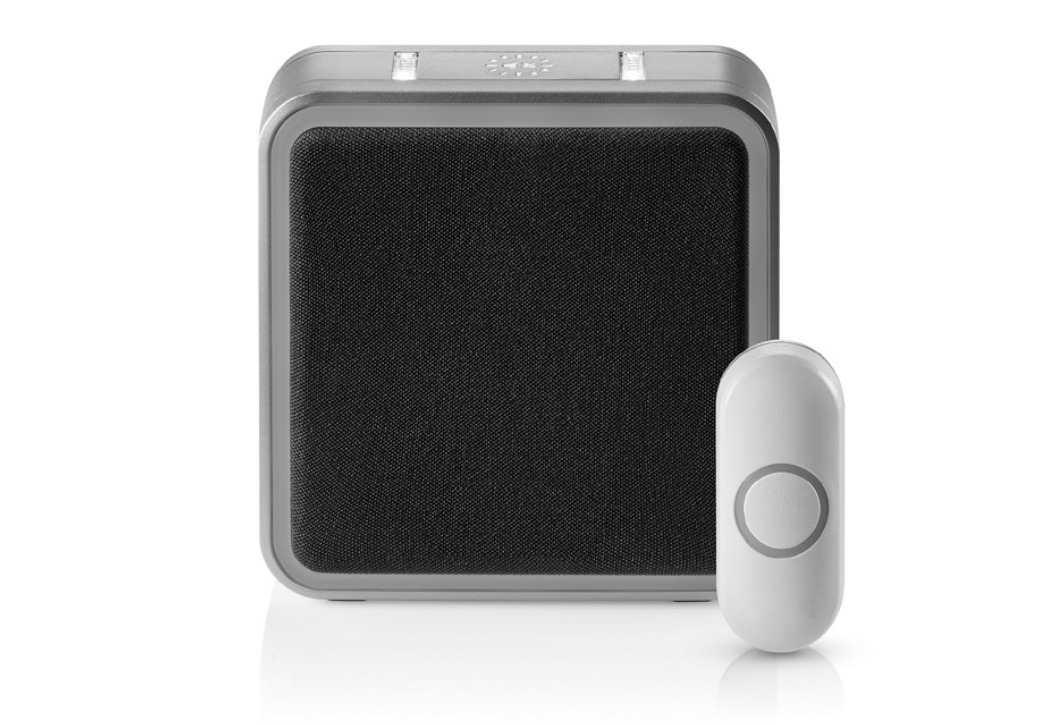
The push button supplied with this kit is pre-programmed to operate with the doorbell. If it is not, see “Connect a Push Button” on page 6.
Overview
Just follow these simple steps:
- Install batteries.
- Set up the doorbell and your preferences.
- Install the doorbell and the push button.
Safety
Before proceeding with the installation, please note the following safety warnings:
- Always follow the manufacturer’s advice when using power tools and wear suitable protective equipment (e.g. safety goggles) when drilling holes, etc.
- Before drilling holes in walls, check for hidden electricity cables and water pipes. The use of a cable/pipe locator is advisable if in doubt.
Install Batteries

- Open the battery cover and install 4 C alkaline batteries.
- Open the battery cover and install the CR2032 battery.
Setup and Operation
Press the push button to test whether it is paired with the doorbell. The doorbell will light up and ring. If it does not, see “Connect a Push Button” on page 6.
Change the Tune
Press the Music button to change the doorbell tune.
Every time you press the Music button, the tune will change. Stop pressing the Music button when you hear the tune you want.

Ding Dong
Westminster
Piano
Fantasy
Marimba
Bell
Soft Alert
Smart Sax
Glocken
Clock-ding-dong
Contemporary
Your Tune (any MP3 file you copy to the doorbell)
Change the Light Pattern
Press the Sunlight button to change the lights that flash when the doorbell rings.
Press the Sunlight button

Change the Halo Light Color
Press the push button.
Within 12 seconds, press the Sunlight button.

Every time you press the Sunlight button, the halo light will change colors. Stop pressing the Sunlight button when you see the color you want:
Light Blue
White
Red
Dark Blue
Green
Purple
Yellow
Mute the Doorbell
Press the Mute button to silence the doorbell.

Set the Mute
You can also mute the doorbell for specific amounts of time. Press the Mute button…

Installation
Choose a location that is not near a heat source or on something that moves (like a door). For non-mounting locations, choose a place where the doorbell will be easy to see and hear.

Install Doorbell
If you are not mounting the doorbell to the wall, place it where you want it.
- Screw the doorbell wall mounting bracket to the wall using the included screws and anchors (if necessary).
Drill 1/4 inch (6.3 mm) holes for the anchors. - Hang the doorbell on the mounting bracket.


Install Push Button
- Mount the push button bracket in the desired location.
Use the screws
–OR–
Use the adhesive backing. If using the adhesive backing, clean the surface first. - Snap the push button onto the mounting bracket.
Note: If you need to remove the push button, use a small screwdriver to release the tab.


Accessories
You can connect up to 6 accessories to your doorbell, including other push buttons, window or door opening sensors, and motion sensors.
If you try to connect more accessories than the max number, the doorbell will sound two beeps.
Connect a Motion Sensor
- Press and hold the Setting button on the doorbell for three seconds. The halo light will circle.
- Within 20 seconds of pressing the Setting button, wave or make some other kind of motion in front of the motion sensor.

Connect a Push Button
Follow these steps to change the ring and halo light color for an existing doorbell, too.
- Press and hold the Setting button on the doorbell for three seconds. The halo light will circle.
- Press the push button.
- Within 12 seconds of pressing the push button, press the Music button to select the ring for that push button.
- Within 12 seconds of pressing the doorbell, press the Sunlight button to select a halo light color for that push button.

Customize your Doorbell
You can customize your doorbell to play part of any song or sound you choose. You can also create a Secret Knock with a different ring.
Your Tune
You can install any MP3 file as a custom tune.

- Connect the USB cable to the doorbell, then plug it into a computer.
- Using your computer, copy the tune you want (MP3 format only) onto the doorbell. The doorbell connects to your computer like a jump drive.
- Follow the Change the Tune process on page 2 to select your tune.
- Press the push button, and your tune will play for up to 15 seconds.
The USB cable can power the doorbell if it is plugged into a USB charging socket. This feature does not work when plugged into a computer.
Secret Knock
You can set up a Secret Knock that makes a different ring and halo light color for each push button. The Secret Knock is triggered by pressing the push button quickly 3 times.
- Press the push button 3 times quickly.
- Within 12 seconds of pressing the push button, press the Music button to select the ring for the Secret Knock.
- Within 12 seconds of pressing the push button, press the Sunlight button to select a halo light color for the Secret Knock.
Maintenance
Your doorbell and push button require no maintenance except to periodically change the batteries.
If using the correct batteries, battery life should be approximately:
- Up to 5 years for the doorbell; replace with 4 C alkaline batteries
- Up to 2 years for the push button; replace with a CR2032 lithium battery
Low Battery Notification
When doorbell batteries are low the bottom edge of the halo light flashes yellow every 6 seconds until batteries are replaced.
When the push button batteries are low, two beep sounds are heard after the normal tune.
Reset
This process removes all pairings, including the push button that came with this doorbell:
- Remove the doorbell battery.
- Press and hold the Setting button, and replace the battery at the same time.
- The halo light will circle, and the doorbell is returned to its factory default settings.
Specifications

Troubleshooting

For help please visit resideo.com or call 1-800-633-3991.
CAUTION: Before operating, make sure that the product components have not been damaged, have not been exposed to water or high temperatures.
FCC Regulations
This device complies with part 15 of the FCC Rules. Operation is subject to the following two conditions: (1) This device may not cause harmful interference, and (2) this device must accept any interference received, including interference that may cause undesired operation.
The grantee is not responsible for any changes or modifications not expressly approved by the party responsible for compliance. Such modifications could void the user’s authority to operate the equipment.
This equipment has been tested and found to comply with the limits for a Class B digital device, pursuant to part 15 of the FCC Rules. These limits are designed to provide reasonable protection against harmful interference in a residential installation. This equipment generates, uses and can radiate radio frequency energy and, if not installed and used in accordance with the instructions, may cause harmful interference to radio communications. However, there is no guarantee that interference will not occur in a particular installation. If this equipment does cause harmful interference to radio or television reception, which can be determined by turning the equipment off and on, the user is encouraged to try to correct the interference by one or more of the following measures:
- Reorient or relocate the receiving antenna.
- Increase the separation between the equipment and receiver.
- Connect the equipment into an outlet on a circuit different from that to which the receiver is connected.
- Consult the dealer or an experienced radio/TV technician for help.
This transmitter must not be co-located or operating in conjunction with any other antenna or transmitter. This equipment should be installed and operated with a minimum distance of 20 millimeters between the radiator and your body.
IC Regulations
CAN ICES-3(B)/ NMB-3(B)
This device complies with Industry Canada licence‐exempt RSS standard(s). Operation is subject to the following two conditions: (1) this device may not cause interference, and (2) this device must accept any interference, including interference that may cause undesired operation of the device.
CAN ICES-3(B)/NMB-3(B)
The device meets the exemption from the routine evaluation limits in section 2.5 of RSS 102 and compliance with RSS-102 RF exposure, users can obtain Canadian information on RF exposure and compliance.
This transmitter must not be co-located or operating in conjunction with any other antenna or transmitter. This equipment should be installed and operated with a minimum distance of 20 millimeters between the radiator and your body.
The operation of this equipment is subject to the following two conditions: (1) this equipment or device may not cause harmful interference, and (2) this equipment or device must accept any interference, including interference that may cause undesired operation.
The product should not be disposed of with other household waste. Check for the nearest authorized collection centers or authorized recyclers.
The correct disposal of end-of-life equipment will help prevent potential negative consequences for the environment and human health.

Resideo Technologies, Inc.
1985 Douglas Drive North, Golden Valley, MN 55422
1-800-468-1502
33-00184EFS—13 M.S. Rev. 09-20 | Printed in United States
©2020 Resideo Technologies, Inc. All rights reserved. The Honeywell Home trademark is used under license from Honeywell International, Inc. This product is manufactured by Resideo Technologies, Inc. and its affiliates.
