Hoover Robot Cleaner User Manual


USER MANUAL

INSTRUCTIONS FOR SAFE USE
This appliance should only be used for domestic cleaning, as described in this user guide. Please ensure that this guide is fully understood before operating the appliance. Always switch off and remove the charger from the socket before cleaning the appliance or any maintenance task. This appliance can be used by children aged from 8 years and above and persons with reduced physical, sensory or mental capabilities or lack of experience and knowledge if they have been given supervision or instruction concerning the use of the appliance in a safe way and understand the hazards involved. Children shall not play with the appliance. Cleaning and user maintenance shall not be made by children without supervision.
If the power cord is damaged stop using the appliance immediately. To avoid a safety hazard, an authorized Hoover service engineer must replace the power cord. If the area to be cleaned contains a balcony or stairs, a physical barrier should be used to
prevent access to the balcony or stairs and ensure safe operation. Small children and pets must be supervised while the Robot is cleaning.
Always store the appliance indoors. Do not use outdoors or expose the appliance to the elements, humidity, or heating sources (oven, fireplace, wet floor). Do not expose the Robot or accessories to excessive heat/cold (keep between 0-30°C). Do not drop the Robot or use any accessory if it has been dropped, damaged, left outdoors, or dropped in water. Never unplug or pull the mains power adaptor by the power cord. Do not use to clean stairs.
Battery Charging
Use only the original charger supplied with the appliance. Check that your supply voltage is the same as that stated on the charger.
Never charge the batteries in temperatures above 30°C or below 0°C. Plug the charger delivered with this appliance into a suitable socket.
Leaks from battery cells can occur under extreme usage or temperature conditions. If the liquid gets on the skin, wash quickly with water. If the liquid gets into the eyes, flush them immediately with clean water for a minimum of 10 minutes. Seek medical attention.
It is normal for the charger to become warm to the touch when charging. Use only attachments, consumables or spares recommended or supplied by Hoover. Do not pick up hard or sharp objects, matches, hot ashes, cigarette ends, or other similar
items.
Do not spray with or pick up flammable liquids, cleaning fluids, aerosols, or their vapors. Do not continue to use your appliance or charger if it appears faulty.
Hoover service: To ensure the continued safe and efficient operation of this appliance we recommend that any servicing or repairs are only carried out by an authorized Hoover service engineer.
Do not use the appliance to clean animals or people. Do not replace the Robot batteries with non-rechargeable batteries.
If the Robot will not be used for a long time (several weeks), unplug the mains power adaptor.
End of life battery removal
If the appliance is to be disposed of the batteries must first be removed. The appliance must be disconnected from the supply mains when removing the battery. Dispose of the batteries safely. Run the appliance until it stops because the batteries are fully discharged. Used batteries should be taken to a recycling station and not disposed of with household waste. To remove the batteries, please contact the Hoover Customer Centre or proceed according to the following instructions. Unplug the charger and switch off the Robot. Turn the Robot over and place it on a level surface.
Remove the screws and battery compartment cover. Remove the battery pack. [Fig. 7]
NOTE: Should you experience any difficulty in dismantling the unit or for more detailed information on treatment, recovery, and recycling of this appliance, please contact your local city office or your household waste disposal service.
IMPORTANT NOTES BEFORE USE
Please read the following information carefully before using your Robot or its accessories.
Do not disassemble the Robot and do not attempt to repair it yourself. If a fault occurs, please contact Hoover after Sales Service for professional advice.
Stairs: The Robot uses sensors to avoid falling down steps, stairs, or over an edge. In some situations, the sensors can become confused. The Robot cannot detect steps that are less than 8cm in height. Steps less than 8cm may cause the Robot to fall down. If available, use the Virtual Barrier to protect your Robot from falling. Highly reflective or very dark surfaces used on some steps or stairs, such as glass or polished ceramics may cause the Robot to fall down. If available use the Virtual Barrier or place a carpet on the lower step to protect your Robot from falling.
Using your Robot on mezzanines, landings, or raised areas without borders should be avoided. If available use the Virtual Barrier to prevent your Robot from entering these areas.
Battery Use: Your Robot is powered by rechargeable, high-capacity lithium-ion batteries. These rechargeable batteries are guaranteed for a period of 6 months if they are maintained and operated according to this User Manual. In the event of a significant drop in the Robot’s performance, replacement batteries can be obtained from your Hoover retailer.
Only use Hoover-approved replacement parts for your Robot. Use of parts that are not approved by Hoover are dangerous and will invalidate your
warranty.
Only use the supplied charging station and mains power adaptor to recharge your Robot. Use of the incorrect charging station or mains power adaptor is dangerous and will invalidate your warranty.
The Environment
The symbol on this appliance indicates that this appliance may not be treated as household waste. Instead, it must be handed over to the applicable collection point for the recycling of electrical and electronic equipment. Disposal must be carried out in accordance with local environmental regulations for waste disposal. For more detailed information about the treatment, recovery, and recycling of this appliance, please contact your local city office, your household, and waste disposal service, or the shop where you purchased the appliance.
CANDY HOOVER GROUP Srl Via Privata Eden Fumagalli, 20861 Brugherio (MB) Italy


CONTENTS OF THE BOX


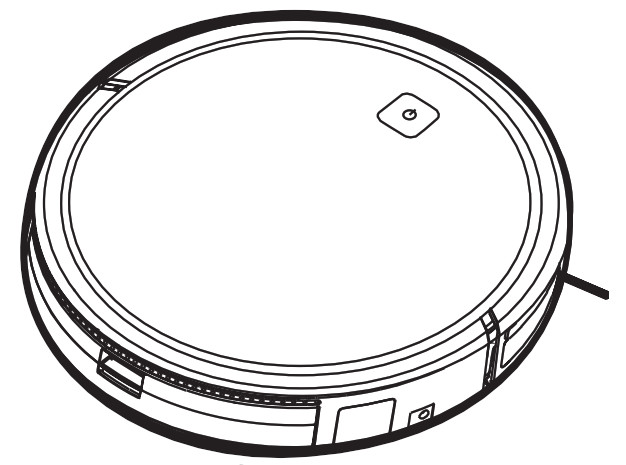
GETTING TO KNOW YOUR CLEANER

- On/Standby Switch with Power LED
- Front Bumper
- Dust Container Release Button
- Dust Container
- Filter Mesh
- Epa Filter
- Sponge Filter
- Filter Holder
- DC Jack, vacuum Robot
- Charger Base
- Mains Power Adaptor
- DC Jack, Charger Base
- Drive Wheel
- Edge Cleaning Brush
- Robot Charging Contacts
- Anti-Fall Sensor
- On/Off Switch
- Suction Power
- Button Forward
- Button Left
- Scheduling Button
- Charging Station Button
- Timing Setting Button
- Button Backward
- Button Right
- Start/Pause Button
- Mode Button
- Display


PREPARE YOUR ROBOT CLEANER

PACKAGING
Do not dispose of your Robot packaging. It may be required the validity of your guarantee in the future. When unpacking your Robot and its accessories, take care to keep plastic bags away from babies, young children, and animals to avoid the risk of suffocation. Before first use, charge your appliance for 8 hours. [Fig. 1]
From the second charge, it will take 4-5 hours to be fully recharged. Do not expose the Robot’s mains power adaptor to temperatures below 0°C or above 30°C as this may damage the battery. The mains power adaptor must only be connected to a standard mains power outlet.
BATTERY
For optimum battery performance, it is recommended that you keep your robot batteries fully charged.
When the robot is not in use it should be left connected to the mains power adaptor. The robot has an
intelligent charging system. This prevents the batteries from becoming overcharged.
To avoid accidents, make sure that every person in the room is aware of the presence of the robot.
Charging Station Setup
Before use, remove obstacles that may get in the path of the Robot. Pay attention to:
- Objects that can be easily knocked over.
- Edges of carpets or rugs that it may get caught on.
- Floor-length curtains and tablecloths.
- Heat sources or flammable items
- Power cords and cables.
- Fragile objects.
Plugin the mains power adaptor and connect to the charging station. [Fig. 2]
- Make sure the power cord is not caught underneath the charging station.
- Place the charging station on a non-reflective level floor, preferably against a wall. If the floor surface is too reflective, it will interfere with the Robot navigation system and it may have difficulty locating the charging station
- There should not be any objects in the area around the charging station for 2 meters in front and 1meter to each side. [Fig. 2]
- Make sure the power cord is not tangled or stretched. If there is an excess, use the power cord tieto store it neatly.
- Check that the dust container is inside on Robot.
- Press the two rotary brushes labeled L and R onto the brackets until they click into place. Pay attention to the designation L and R on the device as well as the brushes. [Fig. 3]
- Guide your Robot into the charging station to begin. During normal use, it will take approximately4/5 hours to complete a full recharge.NOTE: Before first time use the batteries must be charged for at least 8 hours.

Remote Control Setup
Open the battery compartment on the back of the remote control. Insert two AAA / LR03 batteries into
the battery compartment. [Fig. 4] Observe the correct polarity (+/-).
Charging the battery
Switch on the vacuum robot with the On/Off switch on the bottom ( I ). [Fig. 9] Set it down in front of
the charging station. Press the on/ standby switch on the vacuum robot or the charging base button on the remote control
and then immediately the charging station button. Make sure the robotic vacuum cleaner is moving to the charging station. [Fig. 5]
NOTE: Make sure that the charging contacts of the robot vacuum cleaner and charging base are not dirty. Clean the contacts if necessary. It is normal for the charging base and vacuum cleaner to become warm during charging. Remove the water tank before charging the robot vacuum cleaner. When the battery is charging, the on/ standby switch LED flashes blue. If the battery is charged, the LED is on permanently. [Fig. 6]
LED indicator
| LED COLOR | CONDITION |
| PERMANENTLY BLUE | Battery is fully charged |
| BLUE FLASHING | During charging |
| INDICATOR LIGHT OFF | The product is switched off |
| PERMANENTLY RED | Error |
Battery
Over time the capacity of your robot battery will diminish and it will need to be replaced. A replacement
battery can be purchased from an approved Hoover retailer. Only use genuine Hoover spares and
accessories.
Removal and replacement
Ensure the robot is switched OFF.
Locate the battery compartment cover on the underside of the robot and remove the two screws.
Remove the battery from the compartment and disconnect the connector. Refit a new battery and reconnect the connector. Pay attention to the correct alignment of the connector. Refit the battery cover and the two screws. [Fig. 7]
USING YOUR ROBOT CLEANER

Set Time
To use the timer, the first time must be set on the remote control. [Fig. 8]
Press the time button.
Press the Left/Right buttons to select the current day.
Press the Play/Pause button to set the day.
The hours will then start fashing. Press the Up/Down buttons to set the hour.
Press the Left/Right buttons to select the minutes.
Press the Up/Down buttons to set the minutes.
Press the Left/Right buttons to select the minutes.
Press the Up/Down buttons to set the minutes.
Press the Play/Pause button to set the time.
An audible signal is given from the robot signifying that the time has been set.
If the audible signal is not given, press the ‘AUTO’
Power On


- Press the ON/OFF power switch on the bottom robot. [Fig. 9]
- Press the on/ standby button on the device or the start/ pause button on the remote control to start
the cleaning process. [Fig. 10]
In standby mode, the LED is off. To activate the vacuum robot press the on/ standby button on the
device or the start/ pause button on the remote control.
When the battery level is low, the robot automatically returns to the charging station. [Fig. 11]

Setting up the Cleaning Schedule [Fig. 12]
Press the schedule button.
Press the Left/Right buttons to select a day.
Press the Up/Down buttons to select or deselect that day, several days can be selected.
When all required days are selected, press the Play/Pause button to set.
The hours will then start flashing. Set the time you want to start the scheduled cleaning. Press the Up/
Down buttons to set the hours.
Press the Play/Pause button to set the hours.
The minutes will then start flashing.
Press the Up/Down buttons to set the minutes.
Press the Play/Pause button to set the minutes.
An audible signal is given from the robot signifying that the schedule has been set.
If the audible signal is not given, press the ‘AUTO’
button on the remote control.
The LED of the control lamp flashes. At the set time, the cleaning process starts. To deactivate the start time, press the Schedule button
Setting Power Level
Press the POWER LEVEL button
between Normal Power
.Setting Cleaning Mode
AUTO
PARALLEL: Press the MODE button on the remote control for the robot to start cleaning under this mode
.SPOT: Press MODE button on the remote control. It cleans and intensively confined area following a circular path
. EDGE: Press MODE button on the remote control, It will automatically start cleaning along walls, around furniture, etc
.MANUAL: The Robot can be controlled using the arrows on the remote control.
RETURN TO BASE: Press the button
When a cleaning cycle has been completed or the Robot’s battery is low, the robot will also return to the charging base automatically.
WARNING: If there are obstacles in the room being cleaned, the robot might not be able to reach the charging base. In this case, take the robot manually.


MAINTAINING YOUR ROBOT CLEANER

EMPTYING THE DUST CONTAINER
After vacuuming, remove the dust container.
- Press the release button and pull it out. [Fig. 13]
- Hold the dust container over a dust bin. [Fig. 14]
- Use the cleaning brush when necessary to remove any excess dust from the internal surface of the dust container or filter surface.
- Refit the dust container to the Robot.
CLEANING THE FILTERS
The robot is fitted with a pre-motor filter. To maintain optimum cleaning performance, regularly clean the filter cover, the pre-motor filter, and the sponge filter. They should be cleaned every 5 dust container empties and should not be washed.
- Turn the robot off and remove it from the charging station.
- Press the dust container release button and remove the dust container from the Robot. [Fig. 13]
- Remove all filter components and clean them separately. The assembly is done in reverse order. [Fig. 16]
Make sure, that the filter insert is correctly assembled. To ensure this, press the shorter sidewall into
the fitting first, before pushing in the filter on the other sides by pressing down on the edges.
IMPORTANT: Regularly check and maintain the filters by following the filter maintenance instructions. This will maintain your Robot’s performance.

CLEANING ANTI-FALL SENSORS
To maintain the safe operation of your robot it is important to keep the Anti-fall sensors clean. There are 3 sensors are located on the underside of the robot. Turn the robot upside down and clean them with a soft brush to remove any accumulation of dust, dirt or debris. [Fig. 17]
CLEANING THE AGITATOR
Regularly clean the agitator to maintain maximum cleaning performance.
- Turn the Robot off.
- Turn the Robot over. [Fig. 18]
- Press the clips on the soleplate, remove the cap and then remove the agitator. Remove hair and lint, etc. by hand or with a brush.
CLEANING THE EDGE SIDE BRUSHES
The edge cleaning brushes can be easily worn from heavy use so you should check them regularly to monitor their condition.
- Switch the Robot off and turn it over.
- Unclip the two edge-side brushes.
- Use a pair of scissors to remove any trapped hair or debris.
CLEANING THE DRIVE WHEELS
- Switch the Robot off and turn it over.
- Remove any dirt or hair trapped in the wheels.
Clean the wheels with a dry cloth. [Fig. 19]
IMPORTANT NOTICE
Only use approved replacement parts for your Robot. Using parts not validated by Hoover are dangerous and will invalidate your guarantee. If the Robot will not be used for several months, please remove the batteries and store them in cool a dry location.
IMPORTANT: Always make sure your device is switched off before changing.
TROUBLESHOOTING
The following is a list of commonly encountered problems and solutions. If any of these problems persist contact your local Hoover representative.
| The Robot does not work |
|
| Cleaning power is weak |
|
| The Robot is very noisy while cleaning |
|
| The Robot does not automatically charge |
|
| Robot is trapped |
|
IMPORTANT INFORMATION
Hoover Spares and Consumables
Always replace parts with genuine Hoover spares. These are available from your local Hoover dealer or direct from Hoover. When ordering parts always quote your model number.
Quality
Hoover’s factories have been independently assessed for quality. Our products are made using a quality system that meets the requirements of ISO 9001.
Your Guarantee
The guarantee conditions for this appliance are as defined by our representative in the country in which it is sold. Details regarding these conditions can be obtained from the dealer from whom the appliance was purchased. The bill of sale or receipt must be produced when making any claim under the terms of this guarantee. Subject to change without notice.