Asus RP-AC55 Wireless AC1200 Repeater User Guide

Wireless AC1200 Repeater
Quick Start Guide


Package contents
- RP-AC55 Wireless AC1200 Repeater
- Warranty Card
- Quick Start Guide
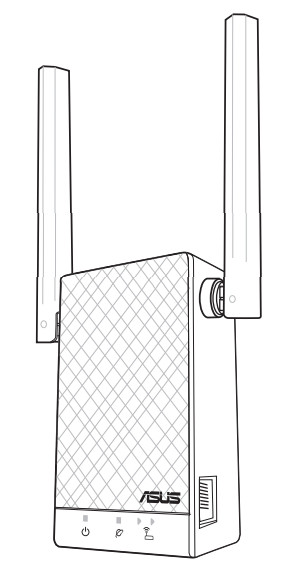
A quick look
- Power switch
- WPS button
On: RP-AC55 is power on.
Off: RP-AC55 is power off.
On: Connected to the router/AP.
Off: Not connected to the router/AP.
Need to move RP-AC55 closer to the router/AP.
Move away slightly
Need to move RP-AC55 slightly away from the router/AP.


Setting up the Repeater
Turning the Repeater on
- Place your RP-AC55 near your Router/AP and plug it to a power outlet. Press the power switch to ON.
- Wait until the power LED changes from red to solid blue, indicating that RP-AC55 is ready to connect to the existing network.

Connecting to a network
Select one of the following ways to connect the Repeater to a network.
Method One: Using WPS (Wi-Fi Protected Setup)
- Press the WPS button on the router/AP.
- Press the WPS button of RP-AC55 for more than five (5) seconds until the Power LED starts to blink.
NOTE: Refer to the section A quick look for the location of the WPS button. Check if RP-AC55’s Wi-Fi indicator turns solid light, which indicates that the Repeater has connected to the wireless network successfully. The Repeater’s wireless network name (SSID) changes to your existing Wi-Fi network name, ending with _RPT or _RPT5G. For example:
Existing Wi-Fi network name: existing NetworkName New Extender 2.4GHz network name: existing NetworkName_ RPT New Extender 5GHz network name: existing NetworkName_ RPT5G To connect an additional Wi-Fi device to your extended network, use the same network password as that of your existing wireless router.

Method Two: Connecting through GUI
- Use a Wi-Fi-enabled device, such as your desktop PC/notebook/tablet, to find and connect to ASUS_RPAC55/ASUS_ RPAC55_5G wireless network.
- Launch a web browser and enter http://repeater.asus.com in the address bar to access the Repeater.
- Follow the Quick Extender Setup steps to set up the Repeater:
• Connect to a Wi-Fi network and when prompted, enter the security key. If your Wi-Fi network is hidden, click the Manual setting.
• Tick Same with Parent AP SSID/Password to copy the router/AP’s SSID and password for your extended network.
You could also set a unique SSID and password for your extended network by typing in the text box. When done, click Apply.
NOTE: The Repeater’s default SSID and password is the same as that of your router/AP, with the SSID ending with _RPT or _RPT5G. You can change these default settings to a unique SSID and password.
• Connect your wireless devices to the new extended network.

Moving the Repeater
- When the connection is complete, place your RP-AC55 between the router/AP and the wireless device to get the best performance.
- After placing your RP-AC55 in an ideal location, RP-AC55 connects to your router/AP in about one (1) minute.
Frequently Asked Questions
Q1: What should I do if my router does not support WPS?
- You can use Method Two to set up RP-AC55.
Q2: Why is it that the LED indicator for the current network does not light up after the Wi-Fi setup is complete?
- You may have entered the wrong password for the router/AP. Please restart your RP-AC55, enter the correct password, and try to set up your RP-AC55 again.
Q3: Why is it that I cannot see the login page after entering http://repeater.asus.com in the browser?
- Ensure that your computer is connected to your RP-AC55 network only, and set your computer to Obtain an IP address automatically. If you still cannot find the login page, please download the ASUS Device Discovery utility. You can download the utility for Windows and Mac from https://www.asus.com/Networking/RP-AC55/HelpDesk_Download/.
Q4: How do I reset RP-AC55?
- Press the RESET button on the side of RP-AC55 for about two (2) seconds. Wait for about five (5) seconds until the existing network LED blinks slowly.
Q5: I cannot access the web GUI to configure the RP-AC55 settings.
- Close all running web browsers and launch again.
- Follow the steps below to configure your computer settings based on its operating system.
Windows 7
A. Disable the proxy server if enabled.
- Click Start > Internet Explorer to launch the web browser.
- Click Tools > Internet options > Connections tab > LAN settings.
- From the Local Area Network (LAN) Settings screen, untick Use a proxy server for your LAN.
- Click OK when done.

B. Set the TCP/IP settings to automatically obtain an IP address.
- Click Start > Control Panel > Network and Internet > Network and Sharing Center > Manage network connections.
- Select Internet Protocol Version 4 (TCP/IPv4), then click Properties.
- Tick Obtain an IP address automatically.
- Click OK when done.

Mac OS
A. Disable the proxy server if enabled.
- From the menu bar, click Safari > Preferences… > Advanced tab.
- Click Change Settings… in the Proxies field.
- From the list of protocols, deselect FTP Proxy and Web Proxy (HTTP).
- Click OK when done.

B. Set the TCP/IP settings to automatically obtain an IP address.
- Click the Apple icon
- Select Ethernet and select Using DHCP in the Configure field.
- Click Apply when done.

