Honeywell DFS8MS Wireless Smoke Detector Instruction Manual


Honeywell DFS8MS Wireless Smoke Detector Instruction Manual

Introduction
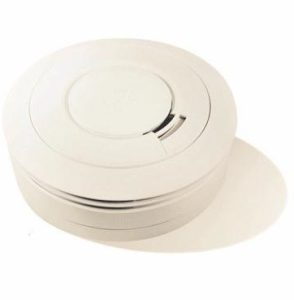
The DFS8MS is an optical wireless smoke detector. It is equipped with a siren and LED light for local notification of alarms, and services acting as an early warning device. When several DFS8MS are placed in the same facility, they are automatically connected.The number of interconnected DFS8MS detectors must not exceed 12.
When one interconnected device detects smoke, all detectors on the system are triggered. It is not necessary for smoke to reach each detector for them to be triggered. A DFS8MS system is a genuine early detection and warning system
Location of the smoke detector
A single smoke detector will guarantee a certain amount of protection if correctly installed but most homes will require two or more to ensure reliable and timely warning. To obtain the recommended level of protection, install a smoke detector in every room where there is a potential fire risk (except for the kitchen or bathroom).
If a single smoke detector is installed, it must be located between the sleeping area and the sources most exposed to risk of fire (living room, hallway near to the kitchen, for example) but not more than 7.5 metres from a room where there is risk of fire occurring and blocking your evacuation. Check that the sound emitted is loud enough to wake the occupants of the bedroom.
If your home has more than one floor, you should install at least one smoke detector per floor.
If your home occupies just one floor, it is preferable to place the detector in a corridor or hallway located between sleeping areas and living rooms. Place it as close as possible to living rooms but check that it is loud enough to wake anyone in the bedroom.
Positioning of smoke detectors
Smoke generally rises to the ceiling and then spreads horizontally. The best place to install the detector is therefore in the centre of the room. Install smoke detectors over 30 cm away from the walls and corners. Also, install the device at least 30 cm away from light fittings or decorations that could prevent the smoke from reaching the smoke detector. If the ceiling is sloped or cone shaped, install the smoke detector less than 60 cm from the summit (measured vertically). If this height is less than 60 cm, the ceiling shall be considered flat for the purposes of smoke alarms.
Places to avoid
- Bathrooms, kitchens, showers, garages or other rooms where there is a risk of a smoke detector being triggered by steam, condensation, smoke emissions or normal emissions. Make sure you install the device over 6m away from sources of smoke emissions/ normal emissions.
- Keep the detector away from very dusty or dirty areas, because a deposit of dust in the room may reduce performance. It may also obstruct the anti-insect screen and prevent smoke from entering the smoke detector chamber.
- Do not install the device in areas infested with insects. If small insects enter the smoke detector chamber, they may trigger intermittent alarms.
- Places where the normal temperature can exceed 40°C or fall below 0°C (that is to say lofts, boiler rooms, above ovens or kettles, etc.) as this can cause the untimely triggering of alarms.
- Near decorations, doors, light fightings, window frames, etc., which can prevent smoke from reaching the detector.
- Surfaces that are generally colder or hotter than the rest of the room (e.g. attic hatches). Temperature differences may prevent smoke from reaching the device.
- Near to or above heaters or air conditioning vents windows wall mounted ventilation grills, etc. that can cause changes in the direction of air flows.
- In very high or hard to access areas (e.g. staircase roofs) where you may find it difficult to reach the detector (to test it, turn it off or replace the battery).
- Place the device over 1m away from dimmer lights and their wiring, due to the risk of interference.
- Place the device over 1.5m away from fluorescent light fittings because “parasites” of electrical origin and their flickering may affect the functioning of the device.
Installation procedure
- Choose a location in accordance with the advice given in the paragraph “Location of the smoke alarm” and “Positioning of the smoke alarm”
- Place the mounting plate on the ceiling at the precise location where you want to install the detector. With a pencil, mark the location of the two screw holes.
- Making sure you avoid any electrical wiring present in the ceiling, pierce a hole with a drill bit in the centre of the locations marked. Insert the plastic dowels into the holes made. Screw the mounting plate to the ceiling (screws provided). Make sure you protect the detection chamber against dust during operation. You may also use the double sided adhesive (specified by Honeywell) and fix the base to the surface. Note: do not use the adhesive unless the surface is smooth and clean.
- Carefully align the device to the base with the help of marks, and turn it as shown in figure 3; then turn it again clockwise (see figure 1b).
(Note: to remove the alarm from the ceiling, turn it anti-clockwise; see figure 1a). - Press the test button to check the alarm is working, as shown in figure 4.
- With a 10 year battery, the radio button is no longer necessary. The registration period is automatically triggered upon activation of the DSF8M (see figure 2).


Securing the alarms
The head of the smoke detector may be secured to prevent any unauthorised removal. Break the little spur located on the base of the detector, as indicted in figure 5. To remove the detector head, it will now be necessary to use a small screwdriver to release the ratchet (pushing it upwards), then unscrew the box (see figure 6).
It is possible, when required, to secure the detector head further by using a self- tapping screw (from 2 to 3 mm in diameter by 6 to 8 mm long, not supplied) to fix the head firmly to the mounting plate (see figure 7).
Fix the head of the smoke detector to the mounting plate. Align the screw (not supplied) to the hollow U-shaped zone illustrated in figure 7 and screw it tight.
To remove the smoke detector head from the ceiling, start by removing the screw. Then, using a small screwdriver, release the ratchet (pushing it upwards), then release the head of the detector by turning it anti-clockwise.

Linking

Installation


Manually testing your smoke detector.
It is recommended the smoke detector be tested after installation, then at least once a week to check the device is working properly. Press the “siren test/stop” button and keep it pressed until an alarm is triggered and the red light starts flashing (see figure 4). The siren will stop sounding once the button is released.
In the case of an interconnected configuration, when one of the DFS8MS detectors enters test mode, all interconnected DFS8MS detectors also enter this mode.
WARNING 1: do not test with a flame. This may set the detector on fire and damage your home. We recommend against testing with smoke because results may be misleading, unless a special device is used.
WARNING 2: make sure you protect your ears during the test.
Test when installing detectors inter-connected by radio
- Position the detectors at their planned installation site
- Fold the antennae of each interconnected detector into two equal parts
- Trigger a detector with the help of smoke or a smoke simulator, then check that once the detector in question has activated its alarm function, all other interconnected detectors also activate their alarm
- Repeat this test for each inter-connected detector
- Reposition the antennae in their initial position (unfolded)
The test is satisfactory if all attempts have led to the activation of the alarm of each interconnected detector.
“Siren test/ stop” button to control your detectors
The DFS8MS detector is equipped with a “siren test/stop” button to help you control it.
• To cancel an alarm, press the test button. The alarm will remain silent for about 10 minutes. The red light on the hood of the smoke alarm will flash every 10 seconds to show that the unit has been muted. If, after 10 minutes, the DFS8MS continues to detect smoke, it will trigger the alarm again.
In an interconnected configuration when one DFS8MS is muted after detecting smoke, all DFS8MS are also muted. Conversely, pressing a test button of a DFS8MS which has not detected smoke will not mute any of the DFS8MS. The DFS8MS whose red light is flashing rapidly is that which has detected smoke.
Replacing the product
This product is powered by a sealed lithium battery that does not need replacing over its recommended 10 year life span.
- As part of regular maintenance, you should always check the device’s replacement date. After this date, the device must be replaced.
- If the device has not been replaced by the due date, its battery will run out, triggering an audio signal every 40 seconds indicating replacement is required.
- When you replace a device, make sure the old one is recycled. Correct disposal or recycling will avoid any damage to the environment or human health. When you dispose of the product, make sure you separate it from other waste to ensure it will be recycled ecologically and healthily.
Note: prolonged exposure to low or high temperatures or an excessive humidity rate may reduce the life span of batteries. The life span of batteries will also be reduced in the case of prolonged warning cycles.
Upkeep
Regularly clean the smoke detector head. Use a soft brush or the brush accessory of your vacuum cleaner to remove dust and spiders webs from side openings through which the smoke enters. To clean the hood wipe it with a damp cloth then dry it carefully.
The smoke chamber of the detector head performs a self-test every 40 seconds. If it is in damaged condition, an audio alarm will sound every 32 seconds. In this case, clean the smoke detector head as indicated above. If the problem persists, return the device. Smoke detectors, particularly optical types (photoelectrical) are susceptible to the penetration of dust and insects, which can trigger false alarms.
The manufacture of this product was undertaken using the most up to date designs materials and techniques. It is nevertheless impossible to avoid completely the effects of contamination by dust and insects. To extend the life span of the detector, you must therefore ensure it is kept clean and prevent the accumulation of dust. Insects or spiders webs found near the smoke detector should be rapidly removed.
In certain circumstances, even regular cleaning may not be sufficient to prevent contaminants from accumulating in the smoke detection chamber, and triggering the alarm. If this occurs, the smoke detector must be returned. Contamination is beyond our control, is totally unforeseeable and should be considered as normal wear and tear. This is why it is not covered by guarantee. Work caused as a result will be invoiced.
WARNING: do not paint the detector.
Finally, the device must be replaced after 10 years of use (check the “replacement date” indicated on the side of the device)
Features


Ademco 1 GmbH
Hardhofweg 40
74821 Mosbach
Phone: +49 1801 466 388
homecomfort.resideo.com
@2020 Resideo Technologies, Inc. All rights reserved The Honeywell Home trademark is used under license from Honeywell International Inc. This product is manufactured by Resideo Technologies, Inc and its affiliates.
Read More About This Manual & Download PDF: