D-Link Access Point DWL-6720AP Installation Guide


D-Link Access Point DWL-6720AP

Introduction
This Quick Installation Guide gives instructions for setting up the D-Link DWL-6720AP Access Point. The model you have purchased may appear slightly different from those shown in the illustrations. For more detailed information about the access point, configuring the device, and technical specifications, please visit website http://www.dlink.com/
Package Contents
Open the shipping carton of the Access Point and carefully unpack its contents. Please consult the packing list located to make sure all items are present and undamaged.
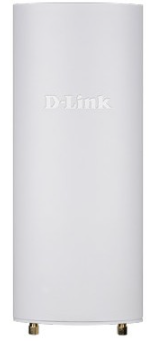
- DWL-6720AP
- Shielded Cat 5E Ethernet Cable
- Mounting kit
- Console cable
- Grounding wire
If any of the above items are damaged or missing, please contact your local reseller for replacement.
Hardware Overview
LED Indicators
| LED Indicators | Colour | Status | Description |
| Power | Red / Green | Solid Red (for around 5 seconds) | Power on. |
| Solid Red | AP crash / AP reboot. | ||
| Solid Green | Completion of power on and ready to work. | ||
| Light Off | Power off. | ||
| LAN (PoE) | Green | Solid Green | Link Present. |
| Blinking Green | Sending or receiving the packets. | ||
| Light Off | Link down / unplug. | ||
| 5 GHz | Green | Solid Green | WLAN link is up. |
| Blinking Green | Sending or receiving the packets. | ||
| Light Off | Radio off / device is undergoing the boot process. | ||
| 2.4 GHz | Green | Solid Green | WLAN link is up. |
| Blinking Green | Sending or receiving the packets. | ||
| Light Off | Radio off / device is undergoing the boot process. |
Connecting to Power
Grounding
Use the grounding wire for grounding the DWL-6720AP.
Powering the Access Point
You can use PoE (802.3af) to power the DWL-6720AP:
- You can directly connect the LAN port on the DWL-6720AP to any available PoE-capable port of an 802.3af-compliant PoE switch (not included into the Package Contents), as illustrated below.
- Alternatively, you may power the DWL-6720AP by connecting a PoE injector’s PoE-OUT (not included into the Package Contents) to the LAN port on the DWL-6720AP. Then connect the PoE injector’s LAN-IN port to an available Ethernet port on your switch or router and plug in the injector’s power cord into a power outlet as shown below.
- The green PWR indicator will illustrate the device is powered properly.


Configuring the Access Point
The DWL-6720AP can be configured using one of the following methods:
Connecting to a PC
- Use the console cable to connect DWL-6720AP to a PC.
- Launch a web browser, type the default IP address of the access point (http://10.90.90.91), then press Enter.
- After the logon pop-up screen appears, type “admin/admin” for the username and password fields. Click Logon.

Connecting to Switch or Router
- Connect the access point and the computer to the same switch or router.
- If the access point did not acquire an IP address from a DHCP server on the network, enter the default IP address of the access point 10.90.90.91 in the address field of your browser. If the access is automatically assigned an IP address by a DHCP server on your network, enter the IP address assigned to the access point into the web browser.
- After the logon pop-up screen appears, type “admin/admin” for the username and password fields. Click Logon.

Connecting to Wireless Controller
- Connect the access point to a Wireless Controller. Connect your computer to the same network as that of the Wireless Controller.
- Log in to the Wireless Controller’s web administration page. For the information about configuring the device please refer to the Wireless Controller user manual.

Access Point Installation
- Use the screwdriver to remove the back panel of the access point.
- Connect the Ethernet-cable to the LAN (PoE) port.
- Use the screwdriver to attach the back panel to the access point.
- Use the grounding wire included into the package contents to ground the access point.
- Mounting the AP to a Wall
Use the mounting base plate to mark the location on the surface where you want to mount the DWL-6720AP. Next, drill the holes on these 2 markings. - Attach the access point to the wall.
- Mounting the AP to a Pole
Use the pole brackets included into the mounting kit to fasten the access point to the pole.
- Mounting the AP to a Pole


Additional Information
For more detailed information on how to set up and configure the access point, please visit the website http://www.dlink.com/
