D-Link DWA-181 AC1300 MU-MIMO Wifi Nano USB Adapter Installation Guide
D-Link DWA-181 AC1300 MU-MIMO Wifi NanoUSB Adapter Installation Guide

SYSTEM REQUIREMENTS
- An available USB slot
- Windows® 10, 8, 7, Mac OS 10.13
- An 802.11ac, 802.11n, or 802.11g wireless network
- CD-ROM Drive (If required)
BEFORE YOU BEGIN
Before installing your new D-Link wireless adapter, please verify the following:
- Remove any previous installations of wireless adapters.
- Disable any built-in wireless and/or Ethernet adapters. For non-preloaded driver setup, make sure that you have accessed the websites required to download the drivers beforehand.
- Verify the wireless network name (SSID) and security settings of the network(s) you want to connect to.
SETUP – NON-PRELOADED DRIVERS
Note: Do not plug in your Wi-Fi adapter until instructed.
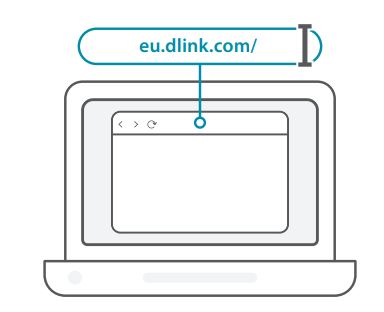
- 1 Type eu.dlink.com/ into the address bar of a web browser.
2 Use the Search function on the website and type in your product’s / model number. The model number for D-Link’s Wi-Fi adapters start with DWA– and can be found on the title page of the packaging’s Quick Start Guide. Click on the corresponding result.- Scroll down the page to the Support section. If the option is / available, select the correct hardware version for your product. Open the Drivers drop down menu and download the appropriate driver for your operating system.
- Unzip the downloaded file. Run the file labeled as Setup.exe. / The welcome screen will appear. Follow the wizard’s instructions to complete the setup. Only plug the Wi-Fi adapter into your computer when instructed to.


You’re all good to go! Connect your computer to your network using the Wi-Fi Name (SSID) and password of the Wi-Fi network you wish to connect to.

SETUP – PRELOADED DRIVERS
- Plug the Wi-Fi adapter into your computer. A prompt will direct you / to the Wi-Fi adapter’s internal storage.
Note: If the prompt does not appear, use a file manager to navigate to the Wi-Fi adapter’s storage. - Run the file labeled as Setup.exe. Follow the wizard’s instructions / to complete the setup.
You’re all good to go! Connect your computer to your network using the Wi-Fi Name (SSID) and password of the Wi-Fi network you wish to connect to.

SETUP – DRIVERS PRELOADED ONTO A CD
Note: Do not plug in your Wi-Fi adapter until instructed.
- Insert the Driver CD into the CD drive. When the autorun screen / appears, click Install and follow the on-screen instructions.
Note: If the CD Autorun function does not automatically start on your computer, press the Windows Key + “R”. In the run box type “D:autorun.exe” (where D: represents the drive letter of your CD drive) and click OK. - The welcome screen will appear. Follow the wizard’s instructions / to complete the setup. Only plug the Wi-Fi adapter into your computer when instructed to.
You’re all good to go! Connect your computer to your network using the Wi-Fi Name (SSID) and password of the Wi-Fi network you wish to connect to.

FREQUENTLY ASKED QUESTIONS
Why does my computer not recognize the Wi-Fi adapter?
Make sure that the Wi-Fi adapter is properly connected to the computer’s USB port. Make sure to completely remove drivers that were previously loaded.
The computer with the Wi-Fi adapter installed is unable to connect to the wireless network and/or the Internet.
- Check that the LED indicators for the broadband modem are indicating normal activity. If not, there may be a problem with the broadband connection.
- Check that the LED indicators on the wireless router are functioning properly. If not, check that the AC power and Ethernet cables are properly connected.
- Check that the IP address, subnet mask, gateway, and DNS settings are correctly configured for the network
For technical support, product documentation and other information, please visit our website. https://eu.dlink.com/suppor