Samsung The Premiere Laser Projector User Manual
SAMSUNG The Premiere LaserProjector User Manual


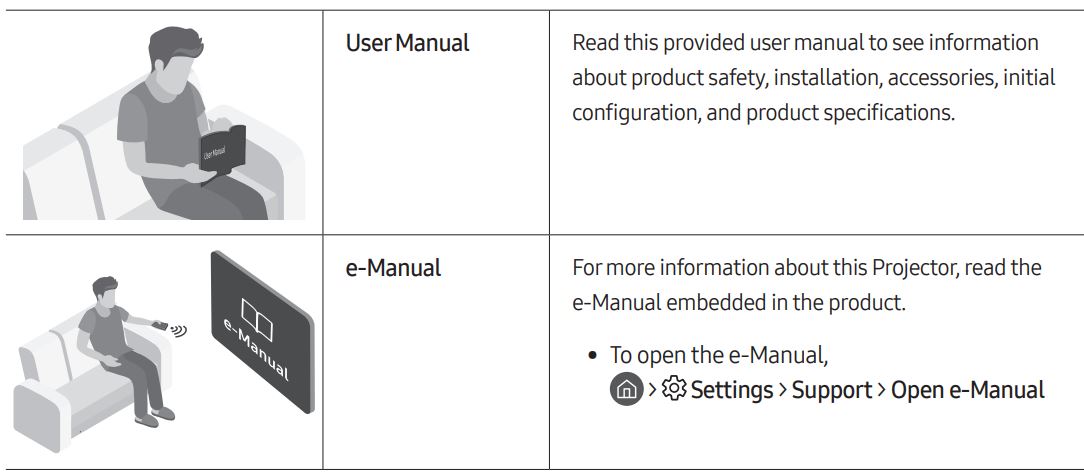
Before Reading This User Manual
This Projector comes with this user manual and an embedded e-Manual. Before reading this user manual, review the following:

On the website (www.samsung.com), you can download the manuals and see its contents on your PC or mobile device.
Learning the e-Manual’s assistance functions
- Some menu screens cannot be accessed from the e-Manual.

Learning the functions of the buttons that appear on e-Manual topic pages

Warning! Important Safety Instructions
Please read the Safety Instructions before using your Projector. Refer to the table below for an explanation of symbols which may be on your Samsung product.

Installation
- The slots and openings in the cabinet and in the back or bottom are provided for necessary ventilation. To ensure reliable operation of this apparatus and to protect it from overheating, these slots and openings must never be blocked or covered.
– Do not place this apparatus in a confined space, such as a bookcase or built-in cabinet, unless proper ventilation is provided.
- Do not place this apparatus near or over a radiator or heat register, or where it is exposed to direct sunlight. - - Do not place vessels (vases etc.) containing water on this apparatus, as this can result in a fire or electric shock.
- Do not expose this apparatus to rain or moisture.
- Be sure to contact an authorised Samsung service centre for information if you intend to install your Projector in a location with heavy dust, high or low temperatures, high humidity, chemical substances, or where it will operate 24 hours a day such as in an airport, a train station, etc. Failure to do so may lead to serious damage to your Projector.
- Do not expose this apparatus to dripping or splashing.
- Do not dispose of batteries in a fire.
- Batteries (battery pack or batteries installed) shall not be exposed to excessive heat such as sunshine, fire or the like.
- CAUTION: There is danger of an explosion if you replace the batteries used in the remote with the wrong type of battery. Replace only with the same or equivalent type.
- Use care when touching the Projector after it has been on for some time. Some parts can be warm to the touch.

Operation
- This apparatus uses batteries. In your community, there might be environmental regulations that require you to dispose of these batteries properly. Please contact your local authorities for disposal or recycling information.
- Do not drop or strike the product. If the product is damaged, disconnect the power cord and contact a Samsung service centre.
- When you need to turn off the Projector completely, wait until the fan stops completely so that the Project can cool down completely.
Power
- Do not overload wall outlets, extension cords, or adaptors beyond their capacity, since this can result in fire or electric shock.
- Power-supply cords should be placed so that they are not likely to be walked on or pinched by items placed upon or against them. Pay particular attention to cords at the plug end, at wall outlets, and at the point where they exit from the appliance.
- To protect this apparatus from a lightning storm, or when left unattended and unused for long periods of time, unplug it from the wall outlet and disconnect the antenna or cable system. This will prevent damage to the set due to lightning and power line surges.
- Before plugging in the AC power cord of the Projector, make sure that the operational voltage of the Projector matches the voltage of your local electrical power supply. Refer to the power specifications section of the manual and/or the power supply label on the product for voltage and amperage information.
- Never insert anything metallic into the open parts of this apparatus. This may cause electric shock.
- To avoid electric shock, never touch the inside of this apparatus. Only a qualified technician should open this apparatus.
- Be sure to plug in the power cord until it is firmly seated. When unplugging the power cord from a wall outlet, always pull on the power cord’s plug. Never unplug it by pulling on the power cord. Do not touch the power cord with wet hands.
- If this apparatus does not operate normally – in particular, if there are any unusual sounds or smells coming from it – unplug it immediately and contact an authorised dealer or Samsung service centre.
- Be sure to pull the power plug out of the outlet if the Projector is to remain unused or if you are going to leave the house for an extended period of time (especially when children, elderly, or disabled people will be left alone in the house).
– Accumulated dust can cause an electric shock, an electric leakage, or a fire by causing the power cord to generate sparks and heat or by causing the insulation to deteriorate. - Use only a properly grounded plug and wall outlet.
- An improper ground may cause electric shock or equipment damage. (Class l Equipment only.) - To turn off this apparatus completely, disconnect it from the wall outlet. To ensure you can unplug this apparatus quickly if necessary, make sure that the wall outlet and power plug are readily accessible.
Cleaning
- To clean this apparatus, unplug the power cord from the wall outlet and wipe the product with a soft, dry cloth. Do not use any chemicals such as wax, benzene, alcohol, thinners, insecticide, aerial fresheners, lubricants, or detergents. These chemicals can damage the appearance of the Projector or erase the printing on the product.
- Do not spray water or any liquid directly onto the Projector. Any liquid that goes into the product may cause a failure, fire, or electric shock.
Laser
- Do not block the light coming out of the projector lens when in operation. The light will heat the object and may melt, cause burns or start a fire.
- Do not look directly at the light from the Projector lens or project the light into any person’s eyes.
- WARNING: MOUNTABOVE THE HEADS OF CHILDREN. Additional warning against eye exposure for close exposures less than 1 m.
- As with any bright source, do not stare into the direct beam, RG2 IEC 62471-5:2015.
- This projector is class1 laser product of IEC 608251:2014 and risk group 2 with the requirements of IEC 62471-5:2015
- Additional instructions to supervise children, no staring, and not use optical aids Notice is given to supervise children and to never allow them to stare into the projector beam at any distance from the projector. Notice is given to use caution when using the remote control for starting the projector while in front of the projection lens. Notice is given to the user to avoid the use of optical aids such as binoculars or telescopes inside the beam.
- Do not open or disassemble the projector as this may cause damage by the exposure of laser Radiation.

Antenna
- Bend down the part where the outdoor antenna line goes into the inside so that rainwater cannot flow into it.
- If you are using an outdoor antenna, please install it away from electrical wires to make sure it does not touch any nearby wires even when it falls down due to heavy wind.

01 What’s in the Box?
Make sure the following items are included with your Projector. If any items are missing, contact your dealer.
- Samsung Smart Remote & Batteries (AA x 2)
- User Manual
- Warranty Card / Regulatory Guide (Not available in some locations)
- Power Cable
- The items’ colours and shapes may vary depending on the models.
- Cables not included can be purchased separately.
- When connecting an HDMI or USB cable, or connecting a USB flash drive to the HDMI or USB port, use a product that has a width of 18 mm or less and a height of 10 mm or less. If the USB cable or USB flash drive does not fit the USB ports of the projector, use an extension cable that supports USB 2.0.
- Use a certified cable with the HDMI logo attached.
- If you do not use a certified HDMI cable, the screen may not display or a connection error may occur. (Recommended HDMI cable types)
- Ultra High-Speed HDMI Cable (3 m or less)

An administration fee may be charged in the following situations: (a) An engineer is called out at your request, but it is found that the product has no defect (i.e., where the user manual has not been read). (b) You bring the unit to the Samsung service centre, but it is found that the product has no defect (i.e., where the user manual has not been read).
You will be informed of the administration fee amount before a technician visits.
02 Product Overview
About the Projector

- Lens
- Remote control sensor / LED Indicators
- Speaker
- Ventilation
- Power button
- Tilt-Adjustment Foot
- The product colour and shape may vary depending on the model.
- Do not block projector intake and exhaust vents.
- When operating the projector in an enclosed space, allow at least 50 cm clearance around the intake and exhaust vents.
03 The Samsung Smart Remote
About the Buttons on the Samsung Smart Remote
- The images, buttons, and functions of the Samsung Smart Remote may differ depending on the model.
- The Universal Remote function operates normally only when you use the Samsung Smart Remote that comes with the Projector.

Pairing the Projector to the Samsung Smart Remote


Installing batteries into the Samsung Smart Remote

To install the batteries, push the rear cover open in the direction of the arrow at the bottom of the illustration, and then insert the batteries as shown in the figure. Make sure that the positive and negative ends are facing in the correct direction. Close the rear cover as shown.
- Alkaline batteries are recommended for longer battery life.
04 Installing the Projector


- Place the projector at an appropriate distance from the screen to be projected, connect with the power cable, and then turn it on.
• When you turn on your Projector for the first time, it immediately starts the Initial Setup. Follow the instructions displayed on the screen and configure the Projector’s basic settings to suit your viewing environment.
-You can turn on the Projector with the power button at the rear of the Projector, and then use the Control menu. The Control menu appears when the power button is pressed while the Projector is On.
– When the screen looks skewed or blurred, adjust the display settings by following the next instruction. - Adjust the angle by moving the projector left or right or adjust the angle adjusting tilt-adjustment foot at the bottom to make the screen to be rectangular.
- Move the projector forward or backward to adjust the projection distance for a desired screen size.
- When the projected screen is unclear, adjust in Settings > General > Projector Settings > Focus.
– When the projected screen is not a right angle, adjust in Projector Settings > Screen Adjustment. In this case, the screen resolution may decrease.
– For information about the screen sizes for each projection distance, refer to the following table.


Image size and projection distance
– The screen sizes for each projection distance may differ depending on the installation environment.

Using the Power button
You can turn on the Projector with the power button at the rear of the Projector, and then use the Control menu. The Control menu appears when the power button is pressed while the Projector is On. For more information about its usage, refer to the figure below.
- Manipulate buttons on the side of the product so that the projected screen is not covered.
- Be careful not to directly get the light emitted from the projector lens.

- The product colour and shape may vary depending on the model.
Mounting the Projector on a wall


- The product colour and shape may vary depending on the model.
Do not install your wall mount kit while your Projector is turned on. This may result in personal injury from electric shock. - For wall mounts that do not comply with the standard screw specifications, the length of the screws may differ depending on the wall mount specifications.
- Do not fasten the screws too firmly. This may damage the product or cause the product to fall, leading to personal injury. Samsung is not liable for these kinds of accidents.
- Samsung is not liable for product damage or personal injury when a non-specified wall mount is used or when the consumer fails to follow the product installation instructions.
- Always have two people mount the Projector onto a wall.

05 Troubleshooting and Maintenance
Troubleshooting
If the Projector seems to have a problem, first review this list of possible problems and solutions. Alternatively, review the Troubleshooting Section in the e-Manual. If none of the troubleshooting tips apply, please visit “www.samsung.com” and click Support or contact the Samsung service centre listed on the back cover of this manual.
- To keep your Projector in optimum condition, upgrade to the latest software. Use the Update Now or Auto update functions on the Projector’s menu (

The Projector won’t turn on.
- Make sure that the AC power cable is securely plugged in to the Projector and the wall outlet.
- Make sure that the wall outlet is working and the Remote control sensor at the front right of the Projector is lit and glowing a solid red.
- Try pressing the Power button at the rear of the Projector to make sure that the problem is not with the remote control. If the Projector turns on, refer to “The remote control does not work”.
There is no picture/video/sound, or a distorted picture/video/sound from an external device, or “Weak or No Signal” is displayed on the Projector, or you cannot find a channel.
- Make sure the connection to the device is correct and that all cables are fully inserted.
- Remove and reconnect all cables connected to the Projector and the external devices. Try new cables if possible.
- Confirm that the correct input source has been selected (
- Perform a Projector self diagnosis to determine if the problem is caused by the Projector orthel device (
- If the test results are normal, reboot the connected devices by unplugging each device’s power cable and then plugging it in again. If the issue persists, refer to the connection guide in the user manual of the connected device.
- If you are not using a cable box or satellite box, and your Projector is receiving TV signals from an antenna or a cable
wall connector, run Auto Tuning to search for channels (
- The Auto Tuning Settings may not appear depending on the model or geographical area.
- If you are using a cable box or satellite box, please refer to the cable box or satellite box manual.


The remote control does not work.
- Check if the Remote control sensor at the front right of the Projector blinks when you press the remote’s Power button. If it does not, replace the remote control’s batteries.
- Make sure that the batteries are installed with their poles (+/-) in the correct direction.
- Try pointing the remote directly at the Projector from 1.5-1.8 m away.
- If your Projector came with a Samsung Smart Remote (Bluetooth Remote), make sure to pair the remote to the Projector.
Changing the Projector’s password

- Run Change PIN and then enter the current password in the password field. The default password is “0000” (France: “1111”).
- Enter a new password and then enter it again to confirm it. The password change is complete.
• If you forgot your PIN code, press the buttons in the following sequence to reset the PIN to “0000” (France: “1111”): On the Samsung Smart Remote: Select (Volume) button. > Volume Up>

06 Specifications and Other Information
Specifications

Environmental Considerations

Notes
- The design and specifications are subject to change without prior notice.
- This device is a Class B digital apparatus.
- For information about the power supply, and more information about power consumption, refer to the information on the label attached to the product.
– For the label-rating and laser-related cautions, see the surface of the bottom of the projector. - Typical power consumption is measured according to IEC 62087.
- All drawings are not necessarily to scale. Some dimensions are subject to change without prior notice. Refer to the dimensions before installing your Projector. Not responsible for typographical or printed errors.
- To connect a LAN cable, use a CAT 7 (*STP type) cable for the connection. (100/10 Mbps) * Shielded Twisted Pair
- Figures and illustrations in this User Manual are provided for reference only and may differ from the actual product appearance. Product design and specifications may change without notice.
Following the repair by a non-authorised service provider, self-repair or non-professional repair of the product, Samsung is not liable for any damage to the product, any injury or any other product safety issue caused by any attempt to repair the product which does not carefully follow these repair and maintenance instructions. Any damage to the product caused by an attempt to repair the product by any person other than a Samsung certified service provider will not be covered by the warranty. Please visit samsung.com/support to find father information about external power adapter and remote control associated with EU Eco-design directive – ERP regulation
Decreasing power consumption
When you shut the Projector off, it enters Standby mode. In Standby mode, it continues to draw a small amount of power. To decrease power consumption, unplug the power cord when you don’t intend to use the Projector for a long time.
Licences

The terms HDMI and HDMI High-Definition Multimedia Interface, and the HDMI Logo are trademarks or registered trademarks of HDMI Licensing LLC in the United States and other countries.
Hereby, Samsung declares that this radio equipment is in compliance with Directive 2014/53/EU and the relevant UK statutory requirements.
The full text of the declaration of conformity is available at the following internet address: http://www.samsung.com go to Support and enter the model name. This equipment may be operated in all EU countries and in the UK. The 5 GHz WLAN(Wi-Fi) function of this equipment may only be operated indoors.
BT max transmitter power : 100mW at 2.4GHz - 2.4835GHz
Wi-Fi max transmitter power : 100mW at 2.4GHz-2.4835GHz, 200mW at 5.15GHz-5.25GHz, 100mW 5.25GHz-5.35GHz & 5.47GHz – 5.725GHz


www.samsung.com/at/support
www.samsung.com/be/support (Dutch)
www.samsung.com/be_fr/support (French)
www.samsung.com/ba/support
www.samsung.com/al/support
www.samsung.com/bg/support
www.samsung.com/hr/support
www.samsung.com/cz/support
www.samsung.com/dk/support
www.samsung.com/fi/support
www.samsung.com/fr/support
www.samsung.com/de/support
www.samsung.com/gr/support
www.samsung.com/hu/support
www.samsung.com/it/support
www.samsung.com/be_fr/support
www.samsung.com/support
www.samsung.com/si/support
www.samsung.com/nl/support
www.samsung.com/no/support
www.samsung.com/pl/support
www.samsung.com/pt/support
www.samsung.com/ro/support
www.samsung.com/rs/support
www.samsung.com/support
www.samsung.com/sk/support
www.samsung.com/es/support
www.samsung.com/se/support
www.samsung.com/ch/support (German)
www.samsung.com/ch_fr/support (French)
www.samsung.com/uk/support
www.samsung.com/ie/support
www.samsung.com/lt/support
www.samsung.com/lv/support
www.samsung.com/ee/support
www.samsung.com/tr/support