Motorola NNTN8234 Dual-Unit Charger User Guide
motorola NNTN8234 Dual-Unit Charger

IMPORTANT SAFETY INSTRUCTIONS
This document contains important safety and operating instructions. Read these instructions carefully and save them for future reference.
Before using the battery charger, read all the instructions and cautionary markings on (1) the charger, (2) the battery, and (3) on the radio using the battery.
WARNINGS

|

OPERATIONAL SAFETY GUIDELINES
- This equipment is not suitable for outdoor use. Use only in dry locations/conditions.
- Connect equipment only to an appropriately fused and wired supply of the correct voltage (as specified on the product). Disconnect from line voltage by removing main plug.
- The socket outlet to which this equipment is connected should be close by and easily accessible.
- In equipment using fuses, replacements must comply with the type and rating specified in the equipment instructions.
- Maximum ambient temperature around the power supply equipment must not exceed 40 °C (104 °F).
- Output power from the power supply unit must not exceed the ratings stated on the product label located at the bottom of the charger.
- Make sure the cord is located where it will not be stepped on, tripped over, or subjected to water, damage, or stress.
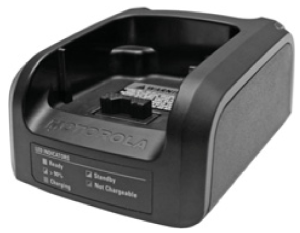
BRIEF DESCRIPTION
The Dual-Unit Charger is intended for use with the Motorola Solutions-approved Lithium-Ion rechargeable batteries (listed in Table 1). The front pocket of the charger is capable of handling a radio with an attached battery. The rear pocket is designed only to charge the batteries (alone).
An illuminated LED indicates the state of charge for the rear pocket; charge status in the front pocket is indicated by the radio display.
The Dual-Unit Charger supports data pass (from the radio to a PC) through the use of the SKN6371C USB Cable (note: USB Data Cable supplied separately).
OPERATIONAL GUIDELINES
- Always remember to power the Dual-Unit Charger first before inserting the radio handset with the attached battery into the front pocket or the auxiliary battery into the charger’s rear pocket.
- Use the Data Cable for data ONLY. The data cable will not support battery charging.
- The front pocket has charging priority over the rear pocket. Therefore, the handset in the front pocket may completely charge its battery before the battery in the rear pocket begins charging.
MOTOROLA SOLUTIONS-AUTHORIZED BATTERIES
The batteries listed in Table 1 are approved for use with the Dual-Unit Charger.
Table 1: Motorola Solutions-Authorized Batteries
| Kit (Part) Number | Platform/Description |
| NNTN8020 | Standard Capacity, Li-Ion |
| NNTN8023 | High-Capacity, Li-Ion |
| PMNN4522 | High-Capacity, IMPRES 2TM, Li-Ion |
| PMNN4801 | IP68 1900T, IMPRES 2, Li-Ion |
| PMNN4802 | IP68 3400T, IMPRES 2, Li-Ion |
| PMNN4582 | IP68 2900T, IMPRES 2, Li-Ion |
MOTOROLA SOLUTIONS-AUTHORIZED POWER SUPPLIES AND COMPATIBLE KLAUS ADAPTERS
The power supplies listed in Table 2 are approved for use with the Dual-Unit Charger.
Table 2: Motorola Solutions-Authorized Power Supplies and Compatible Klaus Adapters
| Power Supply Kit Number | Klaus Adapter | Description | Plug Type |
| NNTN8252_ | SYN7455_ | PS, CHARGER SWITCH MODE, 110–240 V | UK |
| NNTN8253_ | None | PS, CHARGER SWITCH MODE, 110–240 V | US |
| NNTN8254_ | SYN7456_ | PS, CHARGER SWITCH MODE, 110–240 V | EMEA |
| NNTN8255_ | SYN8127_ | PS, CHARGER SWITCH MODE, 110–240 V | Australia/ New Zealand |
| NNTN8256_ | SYN8039_ | PS, CHARGER SWITCH MODE, 110–240 V | Argentina |
| NNTN8257_ | None | PS, CHARGER SWITCH MODE, 110–240 V | Japan |
| NNTN8258_ | SYN7460_ | PS, CHARGER SWITCH MODE, 110–240 V | Korea |
| NNTN8259_ | None | PS, CHARGER SWITCH MODE, 110–240 V | Brazil |
| NNTN8260_ | None | PS, CHARGER SWITCH MODE, 110–240 V | China |
| PS000277A11 | None | PS, CHARGER SWITCH MODE, 100–240 V | US/Japan |
| 25012022001 | |||
| PS000277A12 | None | PS, CHARGER SWITCH MODE, 100–240 V | Europe |
| 25012022002 | |||
| PS000277A13 | None | PS, CHARGER SWITCH MODE, 100–240 V | UK/Hong Kong |
| 25012022003 | |||
| PS000277A14 | None | PS, CHARGER SWITCH MODE, 100–240 V | Australia/ New Zealand |
| 25012022006 | |||
| PS000277A15 | None | PS, CHARGER SWITCH MODE, 100–240 V | Argentina |
| 25012022008 | |||
| PS000277A16 | None | PS, CHARGER SWITCH MODE, 100–240 V | China |
| 25012022004 | |||
| PS000277A17 | None | PS, CHARGER SWITCH MODE, 100–240 V | Korea |
| 25012022009 | |||
| PS000277A18 | None | PS, CHARGER SWITCH MODE, 100–240 V | Brazil |
OPERATING INSTRUCTIONS
Dual-Unit Chargers are intended for use only with the authorized Motorola Solutions batteries and power supplies listed in Table 1 and Table 2 on pages 6 and 7; usage with unauthorized products may prevent proper operation.
The battery charger will accommodate a radio with an attached battery in the front pocket, and a battery alone in the rear pocket. To charge a battery, use the following procedure: (Refer to Figure 1 on page 12).
- Plug the round end of the power supply cord into the DC Connector at the back of the charger.
- Plug the power supply into the appropriate AC outlet. The charger LED will blink green once to indicate a successful power-up.
- Insert a radio with battery, into the charger’s front pocket by:
a. aligning the groove on each side of the radio with the corresponding raised rail on each side of the charger pocket.
b. sliding the radio into the charger pocket, ensuring complete contact between the charger and radio contacts. - When the radio is properly seated in the pocket, the radio display will illuminate and display the charge status.
Note: Charge new batteries overnight to ensure full charge. To minimize charge time, it is recommended to turn the radio OFF. - Insert a battery into the charger’s rear pocket by: a. aligning the slot on each side of the battery with the corresponding raised rail on each side of the charger pocket. b. sliding the battery into the charger pocket, ensuring complete contact between the charger and battery contacts.
- When the battery is properly seated in the pocket, the charger LED will light in accordance with Table 3 on pages 1314.
Note: Charge new batteries overnight to ensure full charge.


TROUBLESHOOTING
When troubleshooting, always observe the color of the LED:
(LED is for Rear Pocket ONLY. Charge indications for the battery attached to a radio is indicated from the radio display)
Table 3: Rear Pocket Battery/Charger Status
| LED Color | Battery/Charger Status |
| No LED indication | The Battery Pocket is empty. Or, the Battery is not fully seated into the Charger Battery Pocket or something is preventing the Charger from detecting the Battery. |
| Single green blink | Successful charger power-up. |
| Blinking red | The Charger identifies the Battery as invalid, damaged or over-charged. The Charger may have detected an open or shorted Battery contact, corrupted Battery data, an invalid Motorola Solutions identifier from the Battery memory device, no Battery memory device. |
| Steady red | The Charger successfully detects a Battery in the Battery Pocket. The Charger is charging the Battery. The Battery is 0–90% charged. |
| Blinking orange | The Charger successfully detects a Battery in the Battery Pocket. The Charger is Waiting to Charge the Battery. Note: The wait may be because the Battery is too hot, too cold, over-discharged, or temporarily gave charge priority to the radio. After the Battery temperature changes to an acceptable value or the Charger recovers the Battery from the over-discharged condition, then the Charger will transition to the appropriate charging mode. |
| Blinking green | The Charger successfully detects a Battery in the Pocket. The Charger is charging the Battery. The Lithium battery is more than 90% charged. |
| Steady green | The Charger successfully detects a Battery in the Pocket. Lithium battery charging is more than 95% complete. |
No LED Indication?
- Make sure that the power supply cable is plugged securely into the DC Connector and that the power supply is plugged into an appropriate AC outlet.
a. Unplug the power supply from the wall. Inspect the electrical contacts on the power supply plug.
b. Unplug the power supply from the charger. Inspect the electrical contacts on the power supply cable and the charger DC connector.
c. Firmly reattach the power supply to the charger.
d. Firmly replug the power supply into the appropriate AC outlet. - Remove the Battery from the Charger Pocket:
a. Inspect the electrical contacts on the Battery.
b. Inspect the electrical contacts in the Charger Pocket.
c. Firmly reinsert the Battery into the Charger Pocket.
Blinking Red LED Indicator?
- Remove the Battery from the Charger Pocket.
a. Verify that the Battery is a Motorola Solutions Battery listed in Table 1 on page 6.
b. Inspect the electrical contacts on the Battery.
c. Inspect the electrical contacts in the Charger Pocket.
d. Firmly reinsert the Motorola Solutions Battery into the Charger Pocket.
e. If the indication persists, contact Motorola Solutions representative.
Blinking Orange LED Indicator?
Wait. The Battery temperature will recover to the allowable range for resumption of charging. Or, the charger will recover the Battery from the over-discharged condition.
Note: Charging outside of the stated temperature and voltage limits can drastically reduce the life expectancy of the battery. When the battery charger detects the proper battery conditions, charging begins automatically (steady red LED).
SERVICE
Do not disassemble the Dual-Unit Charger; it is not repairable and replacement parts are not available. Order replacement chargers as necessary.
MOTOROLA, MOTO, MOTOROLA SOLUTIONS and the Stylized M logo are trademarks or registered trademarks of Motorola Trademark Holdings, LLC and are used under license. All other trademarks are the property of their respective owners.
© 2006 and 2021 Motorola Solutions, Inc.
All rights reserved.
