Yamaha TurboSwing XM Ski Tow Bar Installation Guide


YAMAHA TurboSwing XM Ski Tow Bar

View the online video tutorial at
turboswing.com/technical-faq
TurboSwing NUT & WASHER IDENTIFICATION

Verify all parts are included before you begin.
- (1) TurboSwing Bar
- (1) TurboSwing Base Plate (R)
- (1) TurboSwing Base Plate (L)
- (1) TurboSwing Tube Holder (1)
- (1) TurboSwing Tube Holder (2)
- (1) TurboSwing Pulley
- (4) Black Stoppers
- (2) Black Friction Plates
- (2) Grooved Locking Nut
- (2) Carabiner Clips
- (4) M12x120 Bolt
- (4) M12 Fender Washer
- (6) M12 Lock Nut
- (2) M12x35 Bolt
- (6) M12 Standard Washer
- (2) M8x25 Bolt
- (2) M8 Washer
- (1) M8 Lock Nut
- (1) M8x45 Bolt
Do you have installation questions? Call us @ 855.228.8726 Monday – Friday, 8am-5pm EST
MOTOR BRACKET OPTION
STEP 1: INSTALL THE TurboSwing BASE PLATE
If you are unable to complete a standard installation using your existing motor bracket, the TurboSwing can be mounted directly to your boat’s transom. (See next page for details.)

1a. Locate existing motor brackets non your outboard engine. 1b. Remove existing nut and washer from top motor bracket bolt.
1c. Determine where to drill your TurboSwing holes using the base plate as a guide. Leave 1-2 holes in between the original and new bolts.
1d. Ensure you have space and access inside the transom for your bolt to be inserted using a measuring tape as a guide.

1e. Drill your hole directly through the existing motor bracket hole using a 12mm or 1/2″ drill bit. Be sure the drilbit is long enough to go all the way through the transom.
1f. Add sealant (non-PVC, non-silicon) into the newly drilled hole and around the opening behind the transom to ensure a tight seal.
1g. Manually insert the M12 x 120 bolt with washer into the hole behind the transom.
1h. Remove excess sealant from the exposed bolt end after inserting through the transom.
1i. Put the correct side TurboSwing base plate over the two bolts. (The base plates are labeled “L” or “R”’ to indicate the correct side.)
1j. Insert nut and washer and securely tighten to engine manufacturer’s recommended torque.
1k. Put back the original nut and washer from the motor bracket bolt and tighten firmly to engine manufacturer’s recommended torque.
If original motor bracket bolt is not long enough to accommodate the TurboSwing bracket, replace with supplied M12x120 bolt with washer and tighten to engine manufacturer’s recommended torque
To transom-mount your TurboSwing, switch the Base Plate & Tube Holder on the port/starboard sides so that the tube holder is on the inside of the base plate. The new base plate location should be offset from the motor bracket so that the TurboSwing tube holders are adjacent to the outside of the motor bracket.
IMPORTANT: To avoid spider cracking in your boat’s gel coat, we recommend running your drill in reverse or using a chamfer bit to countersink bolts.

TRANSOM MOUNT OPTION
1a. Locate existing motor brackets on your outboard engine.
1b. Measure 4″ over from top bolt to drill your first 1/2″ hole.
1c. Determine where to drill your second TurboSwing hole using the base plate as a guide.
1d. Remove the base plate and drill your second 1/2″ hole where you marked.

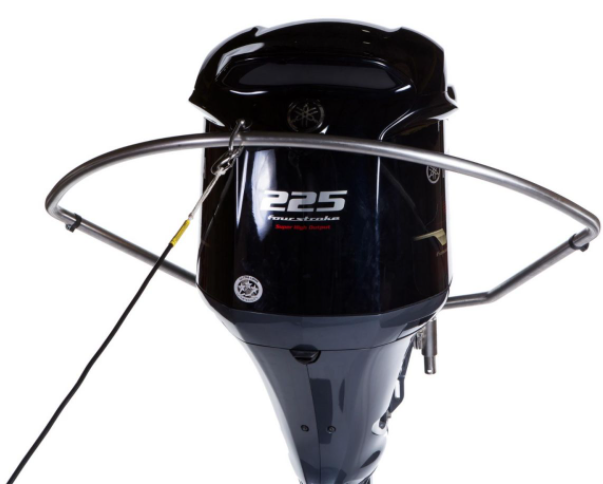
The remaining illustrations show the motor bracket installation option. If you are mounting your TurboSwing to the transom, be aware that you will mount the tube holders to the inside of the base plates.
STEP 2: INSTALL THE TurboSwing TUBE HOLDER

2a. Piece together the M8 x 25 bolt with the grooved locking nut onto the TurboSwing tube holder. Make sure that the “teeth” on the locking nut are properly aligned with the grooves on the tube holder and it is firmly tightened.
2b. Where you position the grooves on the nut and tube holder will determine the height of the TurboSwing. We recommend positioning these teeth the highest position possible to grant maximum rope clearance. This can be adjusted later before finishing the installation if needed.
2c. Position black friction plate on top of the tube holder assembly.
2d. Using a M12 x 35 bolt, secure the tube holder to the base plate and tighten using locking nut. Be sure not to over tighten bolt at tube holder will need to pivot when the motor is trimmed up.
STEP 3: INSTALL THE TurboSwing TUBE BAR

3a. With the bar laying on a level surface, put the pulley onto the bar and loosely attach one of the black stoppers on each side of the bar. Be sure not to tighten too much as these will need to be adjusted later.
NOTE: If a second pulley was purchased, add it on the TurboSwing bar at this time. Don’t worry, a second pulley can easily be added if you decide to add on later.

3b. Trim motor up to allow room for the bar to be inserted into the tube holders.
3c. Lift the bar and insert into the tube holders on either side. 3d. Trim motor as far down as possible without the motor hitting your trailer.

3e. Slide the pulley left and right to be sure that it cannot hit any part of the motor.
3f. If it does hit the motor, remove the bar and place aside. Then remove the tube holders on both sides and loosen the grooved locking nut that is aligned to the tube holder. Position the locking nut down a notch or two as needed and retighten. Be sure teeth are again properly aligned and tightened firmly. Make sure that you move both locking nuts to the same position.
3g. Re-insert the TurboSwing bar into the tube holders and make sure that pulley does not hit the motor in any location.
3h. Turn the motor all the way to one side.
3i. With the motor turned, properly position the black stoppers so that the pulley will not hit the motor when tension on the rope is released.
3j. Tighten existing stopper on one side and add one additional stopper next to it. Make sure both stoppers are securely tightened and touching one another.
3k. Using a measuring tape, measure the stoppers position up the TurboSwing to ensure the other side matches. Position the stoppers on the other side and securely tighten.
3l. Trim the motor up slowly and take note of where the motor hits the TurboSwing. Attach included black pad to the motor on the point of contact with the swing to protect it from scratches. If the motor does not hit the TurboSwing at all, you do not need to attach this pad.
STEP 4: COMPLETE THE TurboSwing INSTALLATION

Complete your TurboSwing install by inserting the supplied carabiners into the holes at the bottom of the TurboSwing tube.
If you are looking for a more permanent installation, feel free to replace the carabiner on either side with the supplied M8x45 bolt and M8 Lock Nut.
Want to Pull Multiple People?
The TurboSwing tow bar can accommodate multiple tow ropes so family and friends can enjoy watersports simultaneously.
Upgrade @ turboswing.com
2640 Byington Solway Rd, Knoxville TN 37931
turboswing.com 855.228.8726