Motorola Single-Unit Charger NNTN8117 User Guide


SINGLE-UNIT CHARGER NNTN8117
USER GUIDE

CHARGER: NNTN8117A
IMPORTANT SAFETY INSTRUCTIONS
This document contains important safety and operating instructions. Please read these instructions carefully and save them for future reference.
Before using the battery charger, read all the instructions and cautionary markings on (1) the charger, (2) the battery, and (3) on the radio using the battery.

- To reduce risk of injury, charge only the rechargeable Motorola Solutions authorized batteries listed in Table 1. Other batteries may explode, causing personal injury and damage.
- Use of accessories not recommended by Motorola Solutions may result in risk of fire, electric shock, or injury.
- To reduce risk of damage to the electric plug and cord, pull by the plug rather than the cord when disconnecting the charger.
- An extension cord should not be used unless absolutely necessary. Use of an improper extension cord could result in risk of fire and electric shock. If an extension cord must be used, make sure that the cord size is 18 AWG for lengths up to 100 ft (30.48 m), and 16 AWG for lengths up to 150 ft (45.72 m).
- To reduce risk of fire, electric shock, or injury, do not operate the charger if it has been broken or damaged in any way. Take it to a qualified Motorola Solutions service representative.
- Do not disassemble the charger; it is not repairable and replacement parts are not available. Disassembly of the charger may result in risk of electrical shock or fire.
- To reduce risk of electric shock, unplug the charger from the ac outlet before attempting any maintenance or cleaning.
- This is a Class A product. In a domestic environment, this product may cause radio interference in which case the user may be required to take adequate measures.
Operational Safety Guidelines
- Turn the radio off when charging the battery.
- This equipment is not suitable for outdoor use. Use only in dry locations/conditions.
- Connect equipment only to an appropriately fused and wired supply of the correct voltage (as specified on the product). Disconnect from line voltage by removing main plug.
- The socket-outlet to which this equipment is connected should be close by and easily accessible.
- In equipment using fuses, replacements must comply with the type and rating specified in the equipment instructions.
- Maximum ambient temperature around the power supply equipment must not exceed 40 °C (104 °F).
- Output power from the power supply unit must not exceed the ratings stated on the product label located on the bottom of the charger.
- Make sure the cord is located where it will not be stepped on, tripped over, or subjected to water, damage, or stress.
Charger Specification
Input: 14 V
Output: 8.4 V

Motorola Solutions Authorized Batteries
The batteries listed in Table 1 are approved for use with the Single-Unit Charger.
Table 1: Motorola Solutions Authorized Batteries
| Kit (Part) Number | Platform/Description |
| PMNN4065 PMNN4104 PMNN4412 PMNN4415 |
MOTOTRBO / NiMH |
| PMNN4406 PMNN4416 PMNN4463 |
MOTOTRBO / Li-Ion |
| PMNN4435* | MOTOTRBO / Li-Ion *Long Life Battery (Typically 1000 Full Charge/Discharge Cycles) |
Table 1: Motorola Solutions Authorized Batteries
| Kit (Part) Number | Platform/Description |
| PMNN4066 PMNN4077 PMNN4101 PMNN4103 PMNN4407 PMNN4409 PMNN4413 PMNN4417 PMNN4418 PMNN4448 PMNN4491 |
MOTOTRBO / IMPRES Li-Ion |
| PMNN4069 PMNN4102 NNTN8129 |
MOTOTRBO / IMPRES Li-Ion FM |
| PMNN4488 | IMPRES Li-Ion 3000 mAh IP68 Battery for Vibrating Belt Clip |
| PMNN4489 | MOTOTRBO / IMPRES Li-Ion TIA4950 HazLoc IP68 |
| PMNN4490 | |
| PMNN4493 | IMPRES Li-Ion 3000 mAh IP68 Battery |
| NNTN7789 | MOTOTRBO / IMPRES Li-Ion CSA |
| NNTN8560 | MOTOTRBO / IMPRES Li-Ion TIA4950 HazLoc IP67 |
Note: In Taiwan, only battery PMNN4493AC is available.
Motorola Solutions Authorized Power Sources and Transformers
The Class 2 battery charger should be used with the direct plug-in, Motorola Solutions authorized transformers listed below:
Table 2: Motorola Solutions Authorized Power Sources/ Transformers
| Base Power Supply | Use with Line Cord Part No. | Description |
| 2571586S07 | N/A | 240 V Transformer (for EU) |
| 2571586S06 | N/A | 230 V Transformer (for HK, UK) |
| 2571586S11 | N/A | 220 V – 240 V Transformer (for Argentina) |
| 2564060M02 | N/A | 240 V Transformer (for China) |
| 25012006001 | 3004209T01 | Switch Mode Power Supply (for EU) |
| 3004209T02 | Switch Mode Power Supply (for HK, UK) | |
| 3004209T07 | Switch Mode Power Supply (for Aus, NZ) | |
| 3004209T13 | Switch Mode Power Supply (for Korea) | |
| 3004209T15 | Switch Mode Power Supply (for Japan) | |
| 3004209T16 | Switch Mode Power Supply (for Brazil) | |
| 25009297001 | N/A | Switch Mode Power Supply (for NA, LA, US, Taiwan) |
Table 2: Motorola Solutions Authorized Power Sources/ Transformers
| Base PowerSupply | Use with Line Cord Part No. | Description |
| 2571886T01 | 3004209T01 | Switch Mode Power Supply (for EU) |
| INDPSU003M | N/A | Switch Mode Power Supply (for India) |
| PS000037A01 | N/A | Single-Voltage Power Adapter (for EU) |
| PS000037A02 | N/A | Single-Voltage Power Adapter (for HK, UK) |
| PS000037A03 | N/A | Single-Voltage Power Adapter (for Aus, NZ) |
| PS000037A04 | N/A | Single-Voltage Power Adapter (for Argentina) |
| PS000037A05 | N/A | Single-Voltage Power Adapter (for China) |
| PS000037A06 | N/A | Single-Voltage Power Adapter (for Korea) |
| PS000037A07 | N/A | Single-Voltage Power Adapter (for Brazil) |
Note: In Taiwan, only power source/transformer 25009297001 is available.
Operating Instructions
Single-Unit Chargers are intended for use only with the authorized Motorola Solutions batteries listed in Table 1 on page 4. Other batteries may not charge properly.
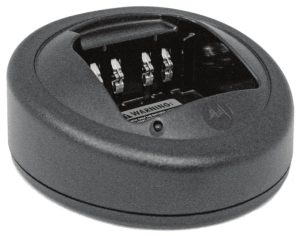
The battery charger’s pocket will accommodate either a radio with a battery attached or a battery alone. Prior to charging a battery with radio, turn the radio off. To charge a battery, use the following procedure: (Refer to Figure 1 on page 9).
- Plug the round end of the transformer cord into the socket on the back of the charger.
- Plug the transformer into the appropriate ac outlet. The charger LED will blink green once to indicate a successful power-up.
- Insert a battery, or a radio with battery (radio turned off), into the charger’s pocket by:
a. aligning the groove on each side of the battery with the corresponding raised rail on each side of the charger pocket.
b. pressing the battery toward the rear of the pocket
c. sliding the battery into the charger pocket, ensuring complete contact between the charger and battery contacts. - When the battery is properly seated in the pocket, the charger LED will light in accordance with Table 3 on pages 10-11.
Note: Charge new batteries overnight to ensure full charge.

Figure 1: Battery Charger
Troubleshooting
When troubleshooting, always observe the color of the LED:
Table 3: LED Indications of Battery/Charger Status
| LED Color | Battery/Charger Status |
| No LED indication | The Battery Pocket is empty. Or, the Battery is not fully seated into the Charger Battery Pocket or something is preventing the Charger from detecting the Battery. |
| Single green blink | Successful charger power-up. |
| Blinking red | The Charger successfully detected a Battery in the Battery Pocket. The Charger identified the Battery as invalid, damaged or over-charged. The Charger may have detected an open or shorted Battery contact, corrupted Battery data, an invalid Motorola Solutions identifier from the Battery memory device, no Battery memory device, or an invalid Nickel battery code resistor. |
Table 3: LED Indications of Battery/Charger Status (Continued)
| LED Color | Battery/Charger Status |
| Steady red | The Charger successfully detected a Battery in the Battery Pocket. The Charger is charging the Battery. The Battery is 0–90% charged. |
| Blinking orange | The Charger successfully detected a Battery in the Battery Pocket. The Charger is Waiting to Rapid Charge the Battery. Note: The wait may be because the Battery is too hot, too cold, or over-discharged. After the Battery temperature changes to an acceptable value or the Charger recovers the Battery from the over-discharged condition, then the Charger will transition to the appropriate charging mode. |
| Blinking green | The Charger successfully detected a Battery in the Pocket. The Charger is charging the Battery. The Nickel battery is in Top-Off Charge. The Lithium battery is more than 90% charged. |
| Steady green | The Charger successfully detected a Battery in the Pocket. Nickel battery charging is complete. Lithium battery charging is more than 95% complete. |
Service
The Single-Unit Chargers are not repairable. Order replacement chargers as necessary.
MOTOROLA, MOTO, MOTOROLA SOLUTIONS and the Stylized M logo are trademarks or registered trademarks of Motorola Trademark Holdings, LLC and are used under license. All other trademarks are the property of their respective owners.
© 2011 and 2020 Motorola Solutions, Inc. All rights reserved

Taiwan Contact:
EU Contact:
Motorola Solutions,
Czerwone Maki 82,
30-392 Krakow,
Poland

68009528001-EF
Printed in
