Bosch GCD 12 JL Professional Heavy Duty Spark Free Metal Cut-off Saw Instruction Manual
BOSCH GCD 12 JL Professional Heavy Duty Spark Free Metal Cut-off Saw Instruction Manual

Safety instructions
General Power Tool Safety Warnings
WARNING
Read all safety warnings, instructions, illustrations and specifications provided with this power tool. Failure to follow all instructions listed below may result in electric shock, fire and/ or serious injury.
Save all warnings and instructions for future reference.
The term “power tool” in the warnings refers to your mains operated (corded) power tool or battery-operated (cordless) power tool.
Work area safety
- Keep work area clean and well lit. Cluttered or dark areas invite accidents.
- Do not operate power tools in explosive atmospheres, such as in the presence of flammable liquids, gases or dust. Power tools create sparks which may ignite the dust or fumes.
- Keep children and bystanders away while operating a power tool. Distractions can cause you to lose control.
Electrical safety
- Power tool plugs must match the outlet. Never modify the plug in any way. Do not use any adapter plugs with earthed (grounded) power tools. Unmodified plugs and matching outlets will reduce risk of electric shock.
- Avoid body contact with earthed or grounded surfaces, such as pipes, radiators, ranges and refrigerators. There is an increased risk of electric shock if your body is earthed or grounded.
- Do not expose power tools to rain or wet conditions.
Water entering a power tool will increase the risk of electric shock. - Do not abuse the cord. Never use the cord for carrying, pulling or unplugging the power tool. Keep cord away from heat, oil, sharp edges or moving parts.
Damaged or entangled cords increase the risk of electric shock. - When operating a power tool outdoors, use an extension cord suitable for outdoor use. Use of a cord suitable for outdoor use reduces the risk of electric shock.
- If operating a power tool in a damp location is unavoidable, use a residual current device (RCD) protected supply. Use of an RCD reduces the risk of electric shock.
Personal safety
- Stay alert, watch what you are doing and use common sense when operating a power tool. Do not use a power tool while you are tired or under the influence of drugs, alcohol or medication. A moment of inattention while operating power tools may result in serious personal injury.
- Use personal protective equipment. Always wear eye protection. Protective equipment such as a dust mask, non-skid safety shoes, hard hat or hearing protection used for appropriate conditions will reduce personal injuries.
- Prevent unintentional starting. Ensure the switch is in the off-position before connecting to power source and/or battery pack, picking up or carrying the tool.
Carrying power tools with your finger on the switch or energising power tools that have the switch on invites accidents. - Remove any adjusting key or wrench before turning the power tool on. A wrench or a key left attached to a rotating part of the power tool may result in personal injury.
- Do not overreach. Keep proper footing and balance at all times. This enables better control of the power tool in unexpected situations.
- Dress properly. Do not wear loose clothing or jewellery. Keep your hair and clothing away from moving parts. Loose clothes, jewellery or long hair can be caught in moving parts.
- If devices are provided for the connection of dust extraction and collection facilities, ensure these are connected and properly used. Use of dust collection can reduce dust-related hazards.
- Do not let familiarity gained from frequent use of tools allow you to become complacent and ignore tool safety principles. A careless action can cause severe injury within a fraction of a second.
Power tool use and care
- Do not force the power tool. Use the correct power tool for your application. The correct power tool will do the job better and safer at the rate for which it was designed.
- Do not use the power tool if the switch does not turn it on and off. Any power tool that cannot be controlled with the switch is dangerous and must be repaired.
- Disconnect the plug from the power source and/or remove the battery pack, if detachable, from the power tool before making any adjustments, changing accessories, or storing power tools. Such preventive safety measures reduce the risk of starting the power tool accidentally.
- Store idle power tools out of the reach of children and do not allow persons unfamiliar with the power tool or these instructions to operate the power tool. Power tools are dangerous in the hands of untrained users.
- Maintain power tools and accessories. Check for misalignment or binding of moving parts, breakage of parts and any other condition that may affect the power tool’s operation. If damaged, have the power tool repaired before use. Many accidents are caused by poorly maintained power tools.
- Keep cutting tools sharp and clean. Properly maintained cutting tools with sharp cutting edges are less likely to bind and are easier to control.
- Use the power tool, accessories and tool bits etc. in accordance with these instructions, taking into account the working conditions and the work to be performed. Use of the power tool for operations different from those intended could result in a hazardous situation.
- Keep handles and grasping surfaces dry, clean and free from oil and grease. Slippery handles and grasping surfaces do not allow for safe handling and control of the tool in unexpected situations.
Service
- Have your power tool serviced by a qualified repair person using only identical replacement parts. This will ensure that the safety of the power tool is maintained.
Safety Instructions for Metal Cutting Saws
- The rated speed of the accessory must be at least equal to the maximum speed marked on the power tool. Accessories running faster than their rated speed can break and fly apart.
- The outside diameter and the thickness of your accessory must be within the capacity rating of your power tool. Incorrectly sized accessories cannot be adequately guarded or controlled.
- Wear personal protective equipment. Depending on application, use face shield, safety goggles or safety glasses. As appropriate, wear dust mask, hearing protectors, gloves and shop apron capable of stopping small abrasive or workpiece fragments. The eye protection must be capable of stopping flying debris generated by various operations. The dust mask or respirator must be capable of filtrating particles generated by your operation. Prolonged exposure to high intensity noise may cause hearing loss.
- Keep bystanders a safe distance away from work area.
Anyone entering the work area must wear personal protective equipment. Fragments of workpiece or of a broken saw blade may fly away and cause injury beyond immediate area of operation. - Position the cord clear of the spinning accessory. If you lose control, the cord may be cut or snagged and your hand or arm may be pulled into the spinning saw blade.
- Regularly clean the power tool’s air vents. The motor’s fan can draw the dust inside the housing and excessive accumulation of powdered metal may cause electrical hazards.
- Do not operate the power tool near flammable materials. Do not operate the power tool while placed on a combustible surface such as wood. Sparks could ignite these materials.
- Do not use accessories that require liquid coolants. Using water or other liquid coolants may result in electrocution or shock.
- Always use undamaged saw blade flanges that are of correct diameter for your selected saw blade. Proper saw blade flanges support the saw blade thus reducing the possibility of saw blade breakage.
- The arbour size of saw blades and flanges must properly fit the spindle of the power tool. Saw blades and flanges with arbour holes that do not match the mounting hardware of the power tool will run out of balance, vibrate excessively and may cause loss of control.
- Do not use damaged saw blades. Before each use, inspect the saw blades for chips and cracks. If the power tool or saw blade is dropped, inspect for damage or install an undamaged saw blade. After inspecting and installing the saw blade, position yourself and bystanders away from the plane of the rotating saw blade and run the power tool at maximum no load speed for one minute. Damaged saw blades will normally break apart during this test time.
Kickback and related warnings
Kickback is a sudden reaction to a pinched or snagged rotating saw blade. Pinching or snagging causes rapid stalling of the rotating saw blade which in turn causes the uncontrolled cutting unit to be forced upwards toward the operator.
For example, if a saw blade is snagged or pinched by the workpiece, the edge of the saw blade that is entering into the pinch point can dig into the surface of the material causing the saw blade to climb out or kick out. Saw blades may also break under these conditions.
Kickback is the result of power tool misuse and/or incorrect operating procedures or conditions and can be avoided by taking proper precautions as given below.
- Maintain a firm grip on the power tool and position your body and arm to allow you to resist kickback forces. The operator can control upward kickback forces, if proper precautions are taken.
- Do not position your body in line with the rotating saw blade. If kickback occurs, it will propel the cutting unit upwards toward the operator.
- Do not attach a saw chain, woodcarving blade or segmented diamond wheel with a peripheral gap greater than 10 mm. Such blades create frequent kickback and loss of control.
- Do not “jam” the saw blade or apply excessive pressure. Do not attempt to make an excessive depth of cut. Overstressing the saw blade increases the loading and susceptibility to twisting or binding of the saw blade in the cut and the possibility of kickback or saw blade breakage.
- When the saw blade is binding or when interrupting a cut for any reason, switch off the power tool and hold the cutting unit motionless until the saw blade comes to a complete stop. Never attempt to remove the saw blade from the cut while the saw blade is in motion otherwise kickback may occur. Investigate and take corrective action to eliminate the cause of saw blade binding.
- Do not restart the cutting operation in the workpiece. Let the saw blade reach full speed and carefully reenter the cut. The saw blade may bind, walk up or kickback if the power tool is restarted in the workpiece.
- Support any oversized workpiece to minimize the risk of saw blade pinching and kickback. Large workpieces tend to sag under their own weight. Supports must be placed under the workpiece near the line of cut and near the edge of the workpiece on both sides of the saw blade.
- Use clamps to support the workpiece whenever possible. If supporting the workpiece by hand, you must always keep your hand at least 100 mm from eitherside of the saw blade. Do not use this saw to cut pieces that are too small to be securely clamped or held by hand. If your hand is placed too close to the saw blade, there is an increased risk of injury from blade contact.
- The workpiece must be stationary and clamped or held against both the fence and the table. Do not feedthe workpiece into the blade or cut “freehand” in any way. Unrestrained or moving workpieces could be thrown at high speeds, causing injury.
- Push the saw through the workpiece. Do not pull the saw through the workpiece. To make a cut, raise the saw head and pull it out over the workpiece without cutting, start the motor, press the saw head down and push the saw through the workpiece. Cutting on the pull stroke is likely to cause the saw blade to climb on top of the workpiece and violently throw the blade assembly towards the operator.
- Never cross your hand over the intended line of cutting either in front or behind the saw blade. Supporting the workpiece “cross handed” i.e. holding the workpiece to the right of the saw blade with your left hand or vice versa is very dangerous.
- Do not reach behind the fence when the saw blade is rotating. Never fail to maintain a safe distance of 100 mm between hand and rotating saw blade (applies to both sides of the saw blade). It might not be possible to tell how close the rotating saw blade is to your hand, and you may be severely injured.
- Inspect your workpiece before cutting. If the workpiece is bowed or warped, clamp it with the outside bowed face toward the fence. Always make certain that there is no gap between the workpiece, fence and table along the line of the cut. Bent or warped workpieces can twist or shift and may cause binding on the spinning saw blade while cutting. There should be no nails or foreign objects in the workpiece.
- Do not use the power tool until the table is free of tools; the workpiece must be the only thing on the table. Small pieces of scrap or other objects that come into contact with the rotating blade can be hurled away at high speed.
- Cut only one workpiece at a time. Stacked multiple workpieces cannot be adequately clamped or braced and may bind on the blade or shift during cutting.
- Ensure the power tool is mounted or placed on a level, firm work surface before use. A level and firm work surface reduces the risk of the power tool becoming unstable.
- Plan your work. Every time you change the bevel or mitre angle setting, make sure the adjustable fence is set correctly to support the workpiece and will not interfere with the blade or the guarding system. Without turning the tool “ON” and with no workpiece on the table, move the saw blade through a complete simulated cut to assure there will be no interference or danger of cutting the fence.
- Provide adequate support such as table extensions, saw horses, etc. for a workpiece that is wider or longer than the table top. Workpieces longer or wider than the power tool table can tip if not securely supported. If the cut-off piece or workpiece tips, it can lift the lower guard or be thrown by the spinning blade.
- Do not use another person as a substitute for a table extension or as additional support. Unstable supportfor the workpiece can cause the blade to bind or the workpiece to shift during the cutting operation pulling you and the helper into the spinning blade.
- The cut-off piece must not be jammed or pressed by any means against the spinning saw blade. If confined, i.e. using length stops, the cut-off piece could get wedged against the blade and thrown violently.
- Always use a clamp or a fixture designed to properly support round material such as rods or tubing. Rods have a tendency to roll while being cut, causing the blade to “bite” and pull the work with your hand into the blade.
- Let the blade reach full speed before contacting the workpiece. This will reduce the risk of the workpiece being thrown.
- If the workpiece or blade becomes jammed, turn the power tool off. Wait for all moving parts to stop and disconnect the plug from the power source and/or remove the battery pack. Then work to free the jammed material. Continued cutting with a jammed workpiece could cause loss of control or damage to the power tool.
- After finishing the cut, release the switch, hold the saw head down and wait for the blade to stop before removing the cut-off piece. Reaching with your hand near the coasting blade is dangerous.
- Hold the handle firmly when making an incomplete cut or when releasing the switch before the saw head is completely in the down position. The braking action of the saw may cause the saw head to be suddenly pulled downward, causing a risk of injury.
- Never remove cuttings etc. from the cutting area while the power tool is running. Always guide the tool arm back to the neutral position first and then switch the power tool off.
- Do not touch the saw blade after working before it has cooled. The saw blade becomes very hot while working.
- Keep your work area clean. Material mixtures are particularly hazardous. Light metal dust may catch fire or explode.
- Do not use saw blades made from high speed steel (HSS). Such saw blades can easily break.
- Check the cable regularly and have a damaged cable repaired only by an authorised customer service agent for Bosch power tools. Replace damaged extension cables. This will ensure that the safety of the power tool is maintained.
- Do not use dull, cracked, bent or damaged saw blades. Unsharpened or improperly set saw blades produce narrow kerf causing excessive friction, blade binding and kickback.
- Always use blades with correct size and shape (diamond versus round) of arbour holes. Blades that do not match the mounting hardware of the saw will run off centre, causing loss of control.
- Make sure that the guard works properly and that it can move freely. Never lock the guard in place when opened.
- Keep the floor free of metal swarf and material remnants. You could slip or trip.
- Operate the power tool only when the work area up to the workpiece is clear of any adjusting tools, metal swarf, etc. Small pieces of metal or other objects that come into contact with the rotating saw blade can strike the operator with high speed.
- Never leave the tool unattended before it has come to a complete stop. Cutting tools that are still running can cause injuries.
- Guide the saw blade against the workpiece only when the saw is switched on. Otherwise there is a risk of kickback occurring if the saw blade catches in the workpiece.
- Never stand on the power tool. Serious injuries may occur if the power tool tips over or if you inadvertently come into contact with the saw blade.
- Only use the power tool for dry cutting. Water entering a power tool increases the risk of electric shock.
Products sold in GB only:
Your product is fitted with an BS 1363/A approved electric plug with internal fuse (ASTA approved to BS 1362).
If the plug is not suitable for your socket outlets, it should be cut off and an appropriate plug fitted in its place by an authorised customer service agent. The replacement plug should have the same fuse rating as the original plug.
The severed plug must be disposed of to avoid a possible shock hazard and should never be inserted into a mains socket elsewhere.
- Never make warning signs on the machine un-recognisable.
- The power tool is delivered with a laser warning sign (see table: “Symbols and their meaning”).
- If laser radiation hits your eye, you must close your eyes and immediately turn your head away from the beam.
- Do not use any optical instruments such as binoculars to view the radiation source. Doing so can damage your eye.
- Do not direct the laser beam at persons who are looking through binoculars or similar instruments. Doing so can damage their eye.
- Do not make any modifications to the laser equipment. The setting options described in these operating instructions can be used safely.
- Do not use the laser goggles (accessory) as protective goggles. The laser goggles make the laser beam easier to see; they do not protect you against laser radiation.
- Do not use the laser goggles (accessory) as sunglasses or while driving. The laser goggles do not provide full UV protection and impair your ability to see colours.
- Warning! If operating or adjustment devices other than those specified here are used or other procedures are carried out, this can lead to dangerous exposure to radiation.
- Do not replace the integrated laser with a laser of another type. A laser that is not compatible with this power tool could pose a risk to persons.

Symbols
The following symbols may be important for the operation of your power tool. Please take note of these symbols and their meaning. Correctly interpreting the symbols will help you to operate the power tool more effectively and safely.
Symbols and their meaning | |
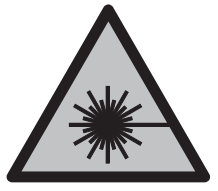
| LASER RADIATION DO NOT EXPOSE USERS OF TELESCOPIC OPTICS CLASS 1M LASER PRODUCT | |
Keep hands away from the cutting area while the power tool is running. Contact with the saw blade can lead to injuries. | |
| Wear safety goggles. | |
Wear hearing protection. Exposure to noise can cause hearing loss. | |
| Wear a dust mask. | |
Take note of the dimensions of the saw blade. The hole diameter must fit the tool spindle without play. If it is necessary to use reducers, ensure that the dimensions of the reducer are suitable for the base blade thickness and the saw blade hole diameter, as well as the tool spindle diameter. Wherever possible, use the reducers provided with the saw blade. | |


Product description and specifications

Failure to observe the safety and general instructions may result in electric shock, fire and/or serious injury.
Please observe the illustrations at the beginning of this operating manual.
Intended use
The power tool is intended for stationary use with saw blades to make straight cuts with and against the grain, as well as mitre angles up to 45° in metal materials without the use of water.
Product features


The numbering of the product features refers to the diagram of the power tool on the graphics page.
- Locking lever
- Laser protection cap
- Spindle lock
- Retracting blade guard
- Chip box
- Angle guide
- Locking spindle
- Quick release
- Spindle handle
- Clamping lever of the saw table extension
- Saw table extension
- Hex key (6 mm)/cross-headed screwdriver
- Clamping handle for mounting the angle guide
- Transport safety lock
- Protective guard
- Handle
- On/off switch
- Laser warning label
- On/off switch for laser (cutting line indication)
- Transport handle
- Cover plate
- Bracket
- Mounting holes
- Chip drawer
- Saw table
- Lower fastening screw (cover plate/retracting blade guard)
- Upper fastening screw (cover plate/retracting blade guard)
- Guide bolt
- Hex socket screw for mounting the saw blade
- Clamping flange
- Saw blade
- Inner clamping flange
- Angle indicator
- Scale for mitre angles
- Set screw for laser positioning (parallelism)
- Screw for angle indicator
- Laser beam output
Technical data
| Metal cut-off saw | GCD 12 JL | |
| Article number | 3601M28 0…. | |
| Rated power input | W | 2000 |
| No-load speed | Min | 1600 |
| Laser type | Nm | 650 |
| mW | <0.39 | |
| Laser class | 1M | |
| Laser line divergence | mrad(full angle) | 1.0 |
| Weight according to EPTA Procedure 01:2014 | Kg | 20 |
| Protection class | ||
| Dimensions of suitable saw blades | ||
| Max. saw blade diameter | mm | 305 |
| Base blade thickness | mm | 1.8-2.5 |
| Hole diameter | mm | 25.4 |

Maximum workpiece dimensions: (see “Permissible workpiece dimensions”, page 15)
The specifications apply to a rated voltage [U] of 220 V. These specifications may vary at different voltages and in country-specific models.
Mounting
- Avoid starting the power tool unintentionally. The mains plug must not be connected to the power supply during assembly or when carrying out any kind of work on the power tool.
Items included
Carefully remove all parts included in the delivery from their packaging.
Remove all packing material from the power tool and the accessories provided.
Check to ensure that all the parts listed below have been supplied before using the power tool for the first time:
- Metal cut-off saw with mounted saw blade
- Hex key/cross-headed screwdriver (12)
Note: Check the power tool for possible damage.
Before continuing to use the power tool, carefully check that all protective devices or slightly damaged parts are working perfectly and according to specifications. Check that the moving parts are working perfectly and without jamming; check whether any parts are damaged. All parts must be fitted correctly and all the conditions necessary to ensure smooth operation must be met.
If the protective devices or any parts become damaged, you must have them properly repaired or replaced by an authorised service centre.
Stationary or flexible mounting
- To ensure safe handling, the power tool must be mounted on a flat, stable work surface (e.g. work bench) before use.
Mounting on a work surface (see figure A)
- Use a suitable screwed connection to secure the power tool to the work surface. Use the holes (23) to do this.

Flexible installation (not recommended)
If, in exceptional circumstances, it is not possible to securely mount the power tool on a work surface, you can improvise by placing the feet of the saw table (25) on an appropriate base (e.g. workbench, flat ground, etc.), without screwing down the power tool.
Changing the saw blade (see figures B1−B4)


- Pull the plug out of the socket before carrying out any work on the power tool.
- Do not activate the spindle lock (3) while the tool spindle is moving. The power tool may become damaged if you do this.
- Wear protective gloves when fitting the saw blade.
There is a risk of injury when touching the saw blade.
Only use saw blades that have a maximum permitted speed higher than the no-load speed of the power tool.
Only use saw blades that are recommended by the power tool manufacturer and are suitable for use on the material you want to saw. This will prevent the saw teeth overheating when sawing.
Removing the saw blade
- Bring the power tool into the work position.
- Loosen the fastening screw (26) (by approx. two turns) using the cross-headed screwdriver (12).
Do not unscrew the screw completely. - Loosen the fastening screw (27) (by approx. six turns) using the cross-headed screwdriver (12).
Do not unscrew the screw completely. - Press the locking lever (1) and swivel the retracting blade guard (4) upwards as far as possible.
- Then pull the retracting blade guard (4) and the cover plate (21) backwards from the fastening screw (27) until the retracting blade guard is held in the bracket (22) by the guide bolt (28).
- Turn the hex socket screw (29) using the hex key (12) provided while pressing the spindle lock (3) until it engages.
- Press and hold the spindle lock (3) and undo the screw (29) by turning it anticlockwise.
- Remove the clamping flange (30).
- Remove the saw blade (31).
Fitting the saw blade
If required, clean all the parts you want to fit before installing them.
- Place the new saw blade onto the inner clamping flange (32).
- When fitting the saw blade, make sure that the cutting direction of the teeth (arrow direction on the saw blade) matches the direction of the arrow on the protective cover.
- Put on the clamping flange (30) and the screw (29).
Press the spindle lock (3) until it engages and tighten the screw by turning it clockwise. - Loosen the spindle lock (3) again. If necessary, pull the knob upwards manually as far as it will go.
- Press the locking lever (1) and push the retracting blade guard (4) and the cover plate (21) back downwards below the fastening screw (27).
- Slowly guide the retracting blade guard (4) downwards until the saw blade is completely covered again.
- Retighten the fastening screws (27) and (26).
Operation
- Pull the plug out of the socket before carrying out any work on the power tool.
Transport safety lock (see figure C)
The transport safety lock (14) makes it easier to handle the power tool when transporting it to various working locations.
Unlocking the power tool (work position)
- Press the tool arm down slightly by the handle (16) to release the transport safety lock (14).
- Pull the transport safety lock (14) all the way out.
- Slowly guide the tool arm upwards.
Note: Make sure that the transport safety lock is not pushed in when working, otherwise the tool arm will not be able to be swivelled to the required depth.
Locking the power tool (transport position)
- Guide the tool arm downwards until you can press the transport safety lock (14) all the way in.
Further information about transporting (see “Transport”, page 17).
Work preparation
Extending the saw table (see figure D)
The free end of long and heavy workpieces must have something placed underneath it or be supported.
The left side of the saw table can be extended using the saw table extension (11).
- Push the clamping lever (10) downwards.
- Pull out the saw table extension (11) to the required length.
- To lock the saw table extension, pull the clamping lever (10) back up.
Setting the mitre angle (see figure E)
The mitre angle can be set between 0° and 45°.
Important settings are marked with corresponding markings on the angle guide (6). The 0° and 45° positions are secured by the respective end stop.
- Loosen the clamping handle (13) of the angle guide (6).
- Turn the angle guide (6) until the angle indicator (33) indicates the desired mitre angle on the scale (34).
- Retighten the clamping handle (13).
Marking the Cutting Line (see figure F)

A laser beam shows you the cutting line of the saw blade.
This allows for exact positioning of the workpiece for sawing, without having to open the retracting blade guard.
- To activate this, turn on the laser beam using the switch (19).
- Align your mark on the workpiece with the right-hand edge of the laser line.
Note: Before sawing, check whether the cutting line is still indicated correctly. The laser beam can be misplaced due to vibrations from intensive use, for example.
Clamping the workpiece (see figure G)
To ensure maximum safety while working, the workpiece must always be firmly clamped. Do not saw workpieces that are too small to clamp firmly.
The free end of long and heavy workpieces must have something placed underneath it or be supported.
The free end of long and heavy workpieces must have something placed underneath it or be supported.
- Place the workpiece against the angle guide (6).
- Slide the locking spindle (7) against the workpiece and clamp the workpiece in place using the spindle handle (9).
Releasing the workpiece
- Release the spindle handle (9).
- Open the quick release (8) and pull the locking spindle (7) away from the workpiece.
Working advice
General sawing instructions
Protect the saw blade against impact and shock. Do not subject the saw blade to lateral pressure.
Do not saw warped/bent workpieces. The workpiece must always have a straight edge to face against the fence.
The free end of long and heavy workpieces must have something placed underneath it or be supported.
Permissible workpiece dimensions
Maximum workpiece dimensions:
| Workpiece shape | Mitre angle | |
| 0° | 45° | |
| Dia. 115 | Dia. 90 | |
| 100×100 | 85×85 | |
| 158×80 | 85×85 | |
| 110×110 | 85×85 | |


Minimum workpiece dimensions (= all workpieces that can still be clamped in place with the locking spindle (7)): Length 80 mm
Max. cutting depth (0°/0°): 115 mm
Dust/chip extraction (see figure H)
The dust from materials such as lead paint, minerals and metal can be harmful to human health. Touching or breathing in this dust can trigger allergic reactions and/or cause respiratory illnesses in the user or in people in the near vicinity.
Certain kinds of metal dust are hazardous, especially in combination with alloys such as zinc, aluminium or chrome. Materials containing asbestos may only be machined by specialists.
- Provide good ventilation at the workplace.
- It is advisable to wear a P2 filter class breathing mask.
The regulations on the material being machined that apply in the country of use must be observed.
The saw blade (31) can become blocked by dust, chips or workpiece fragments in the recess of the saw table (25).
- Switch the power tool off and pull the mains plug out of the socket.
- Wait until the saw blade has come to a complete stop.
- Pull out the chip drawer (24) and empty it completely.
- Avoid dust accumulation at the workplace. Dust can easily ignite.
Starting operation
- Pay attention to the mains voltage. The voltage of the power source must match the voltage specified on the rating plate of the power tool.
- Products that are only sold in AUS and NZ: Use a residual current device (RCD) with a nominal residual current of 30 mA or less.
Position of the operator (see figure I)
- Do not stand in line with the saw blade in front of the power tool. Always stand to the side of the saw blade.
This protects your body against possible kickback.- Keep hands, fingers and arms away from the rotating saw blade.
- Do not reach one arm across the other when in front of the tool arm .
Switching on (see figure J)

- To start, press the on/off switch (17) and keep it pressed.
Note: For safety reasons, the on/off switch (17) cannot be locked; it must remain pressed throughout operation.
The tool arm can only be guided downwards by pushing the locking lever (1).
- Therefore, in order to saw, the locking lever (1) must be pressed in addition to pulling the on/off switch.
Soft start
The electronic soft start limits the torque when the power tool is switched on and increases the service life of the motor.
Switching off
- To switch off, release the on/off switch (17).
Sawing
- Firmly clamp the workpiece as appropriate for its dimensions.
Set the required miter angle as necessary. - Switch the power tool on.
- Push the locking lever (1) and slowly guide the tool arm downwards using the handle (16).
- Saw through the workpiece applying uniform feed.
- Switch off the power tool and wait until the saw blade has come to a complete stop.
- Slowly guide the tool arm upwards.
Checking and adjusting the basic settings
- Pull the plug out of the socket before carrying out any work on the power tool.
To ensure precise cuts, the basic settings of the power tool must be checked and adjusted as necessary after intensive use.
Experience and suitable special tools are required for this.
A Bosch after-sales service point will handle this work quickly and reliably.
Adjusting the laser
Note: To test the laser function, the power tool must be connected to the power supply.
- While adjusting the laser (e.g. when moving the tool arm), never activate the on/off switch. Accidental starting of the power tool can lead to injuries.
- Bring the power tool into the work position.
Checking: (see figure K1)

- Draw a straight cutting line on the workpiece.
- Push the locking lever (1) and slowly guide the tool arm downwards using the handle (16).
- Position the workpiece so that the teeth of the saw blade line up with the cutting line.
- Hold the workpiece in this position and slowly guide the tool arm upwards.
- Clamp the workpiece.
- Turn on the laser beam using the switch (19).
The laser beam must be flush with the cutting line on the workpiece along its entire length, even if the tool arm is guided downwards.
Setting: (see figure K2)
- Turn the set screw (35) using the cross-headed screwdriver (12) provided until the laser beam is parallel with the cutting line on the workpiece along its entire length.
One rotation anticlockwise moves the laser beam from left to right; one rotation clockwise moves the laser beam from right to left.
Aligning the angle indicator (see figure L)

- Bring the power tool into the transport position.
- Loosen the clamping handle (13) of the angle guide (6).
- Turn the angle guide (6) until it stops at 0°.
Checking
- Set an angle gauge to 90° and position it between the angle guide (6) and the saw blade (31) on the saw table (25).
The leg of the angle gauge must be flush with the angle guide along its entire length.
Setting
- Turn the angle guide (6) until the leg of the angle gauge is flush with the saw blade along its entire length.
- Retighten the clamping handle (13).
- Undo the screw (36) with the cross-headed screwdriver (12) provided and align the angle indicator along the 0° mark.
- Retighten the screw.
Transport
Before transporting the power tool, the following steps must be carried out:
- Bring the power tool into the transport position.
- Remove all accessories that cannot be securely fitted to the power tool.
If possible, transport unused saw blades in an enclosed container. - Always carry the power tool by the transport handle (20).
- Only use the transport devices to transport the power tool and never the protective devices.
Maintenance and service
Maintenance and cleaning
- Pull the plug out of the socket before carrying out any work on the power tool.
- Clean the air vents on your power tool regularly. The motor’s fan will draw the dust inside the housing and excessive accumulation of powdered metal may cause electrical hazards.
- In extreme conditions, always use a dust extractor if possible. Blow out ventilation slots frequently and install a residual current device (RCD) upstream. When machining metals, conductive dust can settle inside the power tool, which can affect its protective insulation.
- Have maintenance and repair work performed exclusively by a qualified specialist. This will ensure that the safety of the power tool is maintained.
In order to avoid safety hazards, if the power supply cord needs to be replaced, this must be done by Bosch or by an after-sales service centre that is authorised to repair Bosch power tools.
The retracting blade guard must always be able to move freely and retract automatically. It is therefore important to keep the area around the retracting blade guard clean at all times. Remove dust and chips with a paintbrush.
Accessories
| Article number | |
| Saw blades for cuts in steel (not suitable for stainless steel and aluminum) | |
| 305 x 25.4 mm saw blade, 60 teeth | 2 608 643 060 |
| 305 x 25.4 mm saw blade, 80 teeth | 2 608 643 061 |
After-Sales Service and Application Service
Our after-sales service responds to your questions concerning maintenance and repair of your product as well as spare parts. You can find explosion drawings and information on spare parts at: www.bosch-pt.com
The Bosch product use advice team will be happy to help you with any questions about our products and their accessories.
In all correspondence and spare parts orders, please always include the 10‑digit article number given on the nameplate of the product.
Malaysia
Robert Bosch Sdn. Bhd.(220975-V) PT/SMY
No. 8A, Jalan 13/6
46200 Petaling Jaya
Selangor
Tel.: (03) 79663194
Toll-Free: 1800 880188
Fax: (03) 79583838
E-Mail:
www.bosch-pt.com.my
You can find further service addresses at:
www.bosch-pt.com/serviceaddresses
Disposal
The power tool, accessories and packaging should be recycled in an environmentally friendly manner.

