Lenovo LXP200 Portable Smart Projector User Guide
Lenovo LXP200 Portable Smart Projector User Guide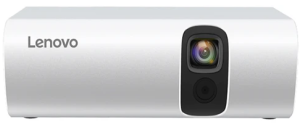

Projector Introduction
- Projector
- Adaptor
- User manual
- Remote Controller


Introduction of the protocol
- Lens of the projector
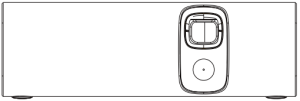
- Back yew cl the projector
- Top of the projector
- Right View of the projector
- Bottom View cf the Projector
- Left view of the projector


Remote Control Description

- Bluetooth pairing mode
- Hold both “OK” and “Volume – ” button five seconds to start remote control pairing mode
- Mouse mode
- Start: click mouse button Close: click navigation button
- Indicator light status
- Slow flash: unpaired mode
Use Projector
Turn on/off the projector
- Turn on
Press and hold the right on/off button for 3 seconds to turn on the device (Figure 1)
Fig.1 - Turn off
Press and hold the power button for 1 second to turn off the device (Figure 1), or press and hold the power button on the remote control to power off.

Focus / adjust brightness
- Manual focus
- Press and hold the ”
- Press and hold the ”
Fig.2
- Press and hold the ”
- Auto focus method
- The distance between the projector and the wall is about 0.5-1.5M, short press the ”
- Tilt the projector back and forth about 45 degrees, the focusing ring will pop up, and auto focus will be activated and complete itself;
- Short press the ”
- The distance between the projector and the wall is about 0.5-1.5M, short press the ”


Bluetooth remote control pairing
Pairing method:

- When the Bluetooth interface appears for the first time as the device is turned on, press the “OK + Volume -” button of the remote controller for about 5 seconds, the remote controller indicator flashes quickly, and the remote controller enters automatic pairing mode.
- Enter the “Settings-Bluetooth” interface through the “Direction/Confirm” button on the body, press the “OK + Volume -” button of the remote controller for about 5 seconds, the remote control indicator flashes quickly, and then click “Scan to find Device”, the remote controller enters automatic pairing mode.
Connect to Wi-Fi network
Enter the system, Settings —> WiFi —> select network and enter the password;

Operation main interface

Instruction of the top navigation bar

How to use mirror function
According to the devices of the mirror function, open the corresponding applications (Apple Screen Mirror / Android Mirror/ Apple wired Mirror), or you can open the relevant applications in “Settings-Mirror” interface to start Screen Mirror function.
Apple Mirror function

- IPhone device connection.
- Connect the device to the network;
- Enter iPhone connection operation, there are two methods for IPhone
- Under Wi-Fi environment: Open the “Settings” of the mobile phone —“Wireless LAN”,
Connect the mobile phone to the same network as the projector; - Without Wi-Fi environment: Open the “Settings” of the mobile phone —“Personal Hotspot”,
Turn on the hot spot and connect the projector to the hot spot; - Go back to the main interface of the phone, slide up to open the control panel, and click Airplay;
- Select “XXX-XXXXXX-XXX”, open “Mirror”, complete.
- Under Wi-Fi environment: Open the “Settings” of the mobile phone —“Wireless LAN”,
Other Functions
Mic Device Connection

- The projector is connected to the Internet: Click ”
- Click ”
- The projector is connected to the Internet: Click ”


Android screen mirror function

- Open the “Android Projection Screen” application on the projector;
- Connect the Android phone and the projector under the same WiFi;
- In the mobile phone “Settings” “WLAN” “Wireless Screen projection”, turn on the wireless projection function, and search for the device “M1S-XXXXXX” (random number), select connection;
- Most Androids can be found in the “Shortcut Bar Screen Sharing/ Screen mirroring/projection screen/WLAN/wireless display/multi-screen interaction”Search the device under the menu and connect.
Wired screen mirror function (I0S)
- 1.Please connect !phone and projector as picture shows(Picture 3)
Pic.3 - Please select “Trust” in the pop-up question of the phone (Picture 4).
Pic.4


Tips: The first connection takes about 45 seconds, please be patient!
Description of external equipment
How to connect a USB flash drive
- Insert the U disk into the USB port, open the “File Management” application, and the device can be identified.
- You can also go to “Home -4 File Management” to check
Software upgrade

Local upgrade:
Copy the downloaded firmware update.zip file to the root directory of the USB flash drive, and insert the USB flash drive (in FAT32 format); the system can automatically recognize the upgrade package and follow the prompts to upgrade (make sure the battery is sufficient when upgrading).
Online upgrade:
In the “Settings-Software Update-System Update” interface, search for the new version upgrade. 3.0 Adjust brightness
There are three brightness modes of “Energy Saving/Nor-mal/High Brightness” for selection under the interface of Settings-Image-Brightness Mode.
How to connect HDMI
After inserting the HDMI device into the HDMI interface, open the “HDMI switch” icon and click to confirm; or after connecting the HDMI device, enter the “Settings-Image-HDMI Connection” interface and confirm to open.

System Settings
Reset the system in “Settings-Software Update-Restore Factory Settings”. System reset will clear the local data and local files in your device and restore it to the state when the device was shipped. Please use this function with caution.

How to charge
Conned the power adapter to the Type-C charging port (Figure 7).
Figure 7
The power indicator light is steady red, which means it is charging. The blue power indicator light is on, indicating that the charging is complete.

Introduction of other functions
- Screen display abnormal situation handling method
- When the screen shows the trapezoid, you can perform horizontal calibration under the “Settings-Image-Keystone Correction” interface; or turn off the “Automatic Keystone Correction” to perform custom corrections, which can solve the problem of image errors.
- When the auto focus of the screen is not clear, place the machine horizontally about 1-2 meters away from the wall, and in the “Settings-Image-Auto Focus” interface, select “Al Mode” for “Al Auto Focus Machine Learning”, It can solve the problem of unclear auto focus of the machine.
- How to connect Bluetooth speakers
- Enter settings—Bluetooth.
- Turn on the Bluetooth speaker and enable the Bluetooth pairing mode (for pairing mode, please check the Bluetooth speaker manual).
- Click “Scan for device” on the interface of the micro projector.
- Then the available Bluetooth speaker name will be displayed in the available devices.
- Click Connect to display the Bluetooth speaker shows “Connected” on the projector to complete.
Product Specification
| Wireless module | IEEE 802.11 a/b/g/n/ac, 2.4G/5G Dual band WiFi |
| Bluetooth | 4. |
| Battery Capacity | Polymer battery 7000 mAh |
| Battery Duration | Up to 100 minutes (Max Volume) |
| Power input | 12V/3A (Type – C, PD agreement) |
| Whole machine power consumption | 36W |
| Android System | Android 7.1 |
| Wireless protocol | Airplay / Miracast / DLNA |
| Product weight | 360g |
| Physical size | 121(L) x 61(W) x 38.5(H)mm |
| Working temperature | 0°C- +35°C |
Note: This manual is for reference only, and the information in the manual is subject to change without notice.
The manufacturer does not assume any direct or indirect responsibility resulting from changes to the manual.
CE statement
- The product shall only be connected to a USB interface of version USB 2.0 or higher.
- Adapter shall be installed near the equipment and shall be easily accessible.
- The operating temperature of the EUT can’t exceed 35°C and shouldn’t be lower than 5°C.
- The plug is considered as disconnect device of adapter.
- The UNII Band 5150-5250 MHz is for indoor use only.
- The device complies with RF specifications when the device is used at 20 cm from your body.Hereby, Screeneo Innovation SA declares that this product is in compliance with essential requirements and other relevant provisions of Directive 2014/53/EUCE statement
- The product shall only be connected to a USB interface of version USB 2.0 or higher.
- Adapter shall be installed near the equipment and shall be easily accessible.
- The operating temperature of the EUT can’t exceed 35°C and shouldn’t be lower than 5°C.
- The plug is considered as disconnect device of adapter.
- The UNII Band 5150-5250 MHz is for indoor use only.
- The device complies with RF specifications when the device is used at 20 cm from your body. Hereby, Screeneo Innovation SA declares that this product is in compliance with essential requirements and other relevant provisions of Directive 2014/53/EU
FCC statement
1519 Labeling requirements This device complies with part 15 of the FCC Rules. Operation is subject to the following two conditions:
- This device may not cause harmful interference, and
- this device must accept any interference received, including interference that may cause undesired operation. 1521 Information to the user
Any changes or modifications not expressly approved by the party responsible for compliance could void the user’s authority to operate the equipment. 15105 Information to user This equipment has been tested and found to comply with the limits for a Class B digital device, pursuant to Part 15 of the FCC Rules.
These limits are designed to provide reasonable protection against harmful interference in a residential installation. This equipment generates, uses and can radiate radio frequency energy and, if not installed and used in accordance with the instructions, may cause harmful interference to radio communications.However, there is no guarantee that interference will not occur in a particular installation. If this equipment does cause harmful interference to radio or television reception, which can be determined by turning the equipment off and on, the user is encouraged to try to correct the interference by one or more of the following measures:
- Reorient or relocate the receiving antenna.
- Increase the separation between the equipment and receiver.
- Connect the equipment into an outlet on a circuit different from that to which the receiver is connected.
- Consult the dealer or an experienced radio/ TV technician for help
FCC ID: A5M-LXP200
FCC RF Radiation Exposure Statement
During operation, the separation distance between the user and the antenna shall be at least 20 cm. This separation distance will ensure that there is sufficient distance from a properly installed externally-mounted antenna to satisfy the RF exposure requirements Product: The crossed-out waste bin symbol on the product means that the product belongs to the family of electrical and electronic equipment. In this respect, the European regulations ask you to dispose of it selectively:
- At sales points in the event of the purchase of similar equipment.
- At the collection points made available to you locally (drop-off center , selective collection, etc.)