Toshiba TY-ASW91 CD/USB Micro Component System with Bluetooth Function User Manual
TOSHIBA TY-ASW91 CD/USB Micro Component Systemwith Bluetooth Function User Manual

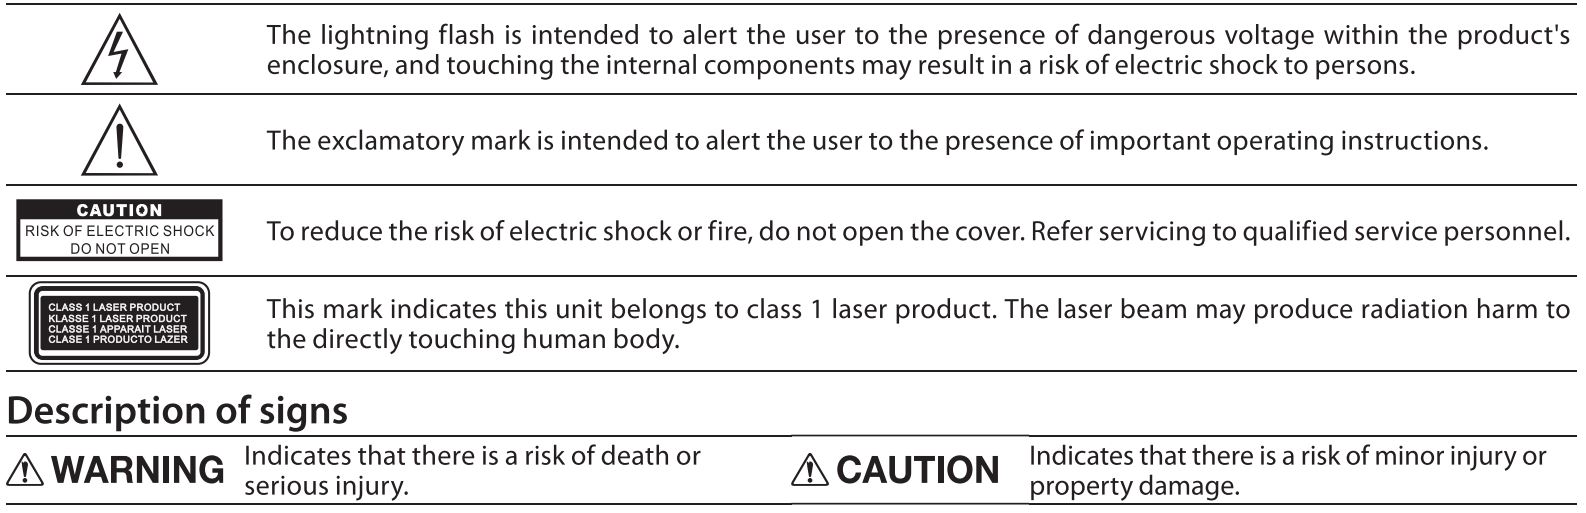
Safety precautions
The information you need to prevent danger to the user and other people as well as property damage is described below. “Description of signs” shows different levels of danger or damage that may occur due to wrong handling.
Important notes
- This book is only a guide for user’s operation, not a criterion for configuration.
- Only use attachments/accessories specified by the manufacturer.


Notes
• If any color shift occurs on a nearby TV or the radio of the device picks up noise from the TV, keep the device away from the TV.
Important Safety Instructions
- Read these instructions.
- Keep these instructions.
- Heed all warnings.
- Follow all instructions.
- Do not use this apparatus near water.
- Clean only with dry cloth.
- Do not block any ventilation openings. Install in accordance with the manufacturer’s instructions.
- Do not install near any heat sources such as radiators, heat registers, stoves, or other apparatus (including amplifiers) that produce heat.
- Do not defeat the safety purpose of the polarized or grounding-type plug. A polarized plug has two blades with one wider than the other. A grounding type plug has two blades and a third grounding prong. The wide blade or the third prong are provided for your safety. If the provided plug does not fit into your outlet, consult an electrician for replacement of the obsolete outlet.
- Protect the power cord from being walked on or pinched particularly at plugs, convenience receptacles, and the point where they exit from the apparatus.
- Only use attachments/accessories specified by the manufacturer.
- Unplug this apparatus during lightning storms or when unused for long periods of time.
- Refer all servicing to qualified service personnel. Servicing is required when the apparatus has been damaged in any way, such as power-supply cord or plug is damaged, liquid has been spilled or objects have fallen into the apparatus, the apparatus has been exposed to rain or moisture, does not operate normally, or has been dropped.
- This equipment is a Class II or double insulated electrical appliance. It has been designed in such a way that it does not require a safety connection to electrical earth.
- No naked flame sources, such as lighted candles, should be placed on the apparatus.
- Attention should be drawn to environmental aspects of battery disposal.
- The product is designed to use in moderate climates.

FCC Radiation Exposure Statement
This equipment complies with FCC radiation exposure limits set forth for an uncontrolled environment. This equipment should be Installed and operated with minimum distance 20 CM between the radiator & your body.
FCC Statement:
This device complies with Part 15 of the FCC Rules. Operation is subject to the following two conditions:
(1) This device may not cause harmful interference, and
2) This device must accept any interference received, including interference that may cause undesired operation.
Note: This equipment has been tested and found to comply with the limits for a Class B digital device, pursuant to part 15 of the
FCC Rules. These limits are designed to provide reasonable protection against harmful Interference In a residential Installation.
This equipment generates, uses, and can radiate radio frequency energy and, if not installed and used in accordance with the instructions, may cause harmful interference to radio communication. However, there is no guarantee that interference will not occur in a particular installation. If this equipment does cause harmful interference to radio or television reception, which can be determined by turning the equipment off and on, the user is encouraged to try to correct the interference by one or more of the following measures:
- Reorient or relocate the receiving antenna.
- Increase the separation between the equipment and receiver.
- Connect the equipment into an outlet on a circuit different from that to which the receiver is connected.
- Consult the dealer or an experienced radio/TV technician for help.
Caution: Changes or modifications not expressly approved by the party responsible for compliance could void the user’s authority to operate the equipment.
IC-CANADA:
This device contains licence-exempt transmitter(s}/receiver(s) that comply with Innovation, Science and Economic Development Canada’s licence-exempt RSS(s). Operation is subject to the following two conditions:
(1) This device may not cause interference.
(2) This device must accept any interference, including interference that may cause undesired operation of the device.
RF warning statement:
This equipment complies with IC radiation exposure limits set forth for an uncontrolled environment. This equipment should be installed and operated with minimum distance 20cm between the radiator & your body.
California Prop 65 Warning:

Disclaimer
- Toshiba shall not be responsible for any damage caused by an earthquake, thunderstorm, flood damage, fire for which Toshiba is not responsible, acts of a third party, other accidents, or damages caused by the user’s wilful acts or negligence, misuse, or use in abnormal conditions.
- Toshiba shall not be responsible for any damage caused by failure to observe the information described in the operation manual.
Disposal
- When disposing of the device, observe the laws, or ordinances and rules of the local government.
About Using Bluetooth®
This unit is designed for use with Bluetooth® wireless devices compatible with the HFP, HSP, A2DP and AVRCP streaming audio profiles. Refer to your Bluetooth® device’s user manual or technical support to determine if your Bluetooth® device supports these profiles.
■ Frequency band used
This unit uses the 2.4 GHz frequency band. However other wireless devices may use 2.4 GHz frequency band as well and may cause interference with each other. To avoid interference, please refrain from the use of the unit at the same time with other wireless devices.
■ Certification of this device
This unit conforms to frequency restrictions and has received certification based on frequency laws, so a wireless permit is not necessary. However, the following action is punishable by law in some countries:
- Taking apart/modifying the unit.
■ Usage restrictions
- Wireless transmission and/or use with all Bluetooth* equipped devices is not guaranteed.
- A device featuring the Bluetooth® function is required to conform to the Bluetooth® standard specified by Bluetooth SIG, and be authenticated. Even if the connected device conforms to the above mentioned Bluetooth® standard, some devices may not be connected or work correctly, depending on the features or specifications of the device.
■ Range of use
Use this device within an unobstructed 10 m range. The range of use or perimeter may be shortened depending on any obstructions, devices causing interference, other people in the room, or the construction of the building.
The Bluetooth® word mark and logos are owned by the Bluetooth SIG, Inc. and are used under license.
Power supply
Insert the power plug into an AC receptacle.
Notes
- Before disconnecting the power plug, press the [c.!>] button to turn off the power.
- The unit is not disconnected from the mains as long as it is connected to the AC outlet, even if the unit itself has been turned off.
Part names

Accessories
Remote control (one battery included) 1 set
Remote control
■ Replacing the remote control battery
- Remove the battery compartment cover on the back of the remote control.
- Load one RO3 (AAA size) battery into the battery compartment making sure that the battery has been inserted with the correct polarities matching the symbols+,- as indicated inside the battery compartment.
- Replace the cover.

Connecting the speakers
Connect the left speaker to the SPEAKER OUT L terminal, and the right speaker to the SPEAKER OUT R terminal.

Common operation
How to use the buttons
- Press: means to press the button briefly and then release it (less than 2 seconds).
- Press and hold: means to continue to press the button for a longer period of time (2 seconds or more).

Listening to Bluetooth® Music
You can enjoy audio from a Bluetooth® enabled device which connects with wireless, through the speakers of this unit. When connecting with Bluetooth® enabled device, it is necessary to register the devices in advance. This registration is called pairing. Setting will be maintained even though the power is turned off upon pairing. It will be automatically connected to the device last connected if the power is turned on once again. In order to use this unit for music playback through Bluetooth®, the unit must first be paired with the Bluetooth” device.
Notes
- Enable Bluetooth® functions on the connecting Bluetooth«> enabled device. In addition, make sure the distance between this unit and the device is within 10 m.
- Since the pairing procedure can vary by device, please consult the user manual of your device.
- Press the[
- On the remote control: Press (
On the unit: Press [FUNCTION] button repeatedly to switch the source to “bt”(Bluetooth). “bt” blinks. - Set the Bluetooth” enabled device into outgoing mode.
When the device is already paired, go to step 4.
• Following the instructions on your device’s user manual, activate Bluetooth~ on your device and search for devices. Once you have found “TY-ASW91 “, pair to the unit. Input the password 0000 if required.
• Once connected, Paring/Connected sound is heard “bt” stays lit. - Replay your Bluetooth® device.
You can hear a sound from the speaker of this unit.
• Operate Playback, Stop, etc. on your Bluetooth® enabled device.
• Adjust the volume level on this unit.
• To cancel the Bluetooth® pairing, press and hold the [
• To connect another Bluetooth® device, disconnect current device, then operate to connect another device.


Listening to a CD/USB
■ About music CDs and MP3
- Do not use any disc that is not round. If a disc with a special shape (heart, card, etc.) is used, the disc may pop out due to high speed rotation, causing an injury.
- For CD-R and CD-RW discs, commercially available general discs recorded in the music recording standard format (CDDA* format) and discs recorded in the MP3 audio format can be played.
- A disc with low reflection rate may not be read.
- Nonstandard discs such as copy-control CDs and special-shaped discs cannot be played.
- Do not open the CD door during replay. Doing so may damage the CD.
- If the CD has any scratch, fingerprints, or dust on it, it may not be played. It may skip or stop even if it can be played partially.
- Mount the CD onto the catcher of the disc table firmly. Mounting it incorrectly may damage the CD or cause a failure.
- If the CD is not mounted correctly or the disc is unreadable, “no discs” is displayed and the CD cannot be played.
- Store a CD in the dedicated case. Handle a CO carefully not to stain or damage the CD surfaces.
- Do not attach any paper or sticker on the CD surfaces. It may cause decentring or wobbling, making it unreadable.
- Do not place a CD in a place with high temperature such as a place with direct sunlight or near a heater. The CD may be deformed and become unreadable.
- Before inserting a CD, wipe off any dust or fingerprints on the replay surface with a soft cloth.
- Do not use thinner, benzene, or alcohol because they damage the information surface of the CD, making it unreadable.
- After a music CD is loaded, the total number of tracks is displayed. Once replay starts, the track number being played and elapsed time is displayed.
- After an MP3 disc is loaded, the total number of folders and the total number of tracks are displayed. Once replay starts, the folder number and track number being played and elapsed time are displayed.
- The maximum number of folders that can be played is 99. The maximum number of tracks is 999.
- MP3 discs in the MP3 (MPEG Audio Layer-3) format can be played.
- CD-DA stands for “Compact Disc Digital Audio.” It is a standard for music recording used for general audio CDs.
- TOSHIBA will not be held liable for the loss of data whilst the USB memory is connected to the audio system.
- Files compressed in MP3 format only can be played back when connected to the USB memory terminal.
- This USB memory’s format supports FAT 16 or FAT 32.
- TOSHIBA cannot guarantee that all USB memory devices will work on this audio system.
- USB cable is not recommended for use in this audio system to connect to USB memory. Use of the USB cable will affect the performance of this audio system.
- This USB memory cannot be operated via USB hub.
- The USB terminal in this unit is not intended for a PC connection and is only intended for use with USB memory.
- External HOD-storage cannot be played back via USB memory terminal.
- If the data inside the USB memory is large, it may take longer to read the data.
■ Normal play
- Press the[
The power will be turned on in the last-used state (“d ISC”/”USb”/’tuna Err”/”Lon E I n”/”bt”). - CD: Press the button to open the CD tray, mount the CD with its printed face up, and then close the CD tray.
USB: Insert the USB memory into the [USB] terminal. - On the remote control: Press [CD] or [USB] button. On the unit: Press [FUNCTION] button repeatedly to switch the source to “disc” (Disc) or Hub”(USB).
Commercially available music CD: When loading is complete, the total number of tracks and total play time are displayed.
MP3: When loading is complete, the total number of folders and the total number of tracks are displayed. (“MP3” mark is displayed.) - Press the [▶II] button.
The playback starts from the track number. - To stop playback, press the[ ■] button.
Replay stops when all the tracks are finished even if the [ ■] button is not pressed.

■ Repeat/Random replay
Press the [P-MODE] button during replay or pause of the CD/USB.
Each time [P-MODE] is pressed, the replay mode changes as follows.
• During one track repeat, you can change the track by pressing the button.

Caution
- When you press the [■ /AUTO) button, replay stops and repeat / random replay is cancelled.
■ Programmed replay
Up to 20 tracks for an Audio CD or 99 tracks for an MP3 can be programmed to play back in any order.
- Press the [PRG/MEMORY] button during a stop to start program setting.
Track number and “P0l” are displayed. - Press the
• While playing MP3 tracks, you can change folder by pressing [FOLD +]/[FOLD-]. - Press the [PRG/MEMORY] button to enter the
track into setting.
Display changes to “P02”. - To program another track number, repeat steps 2 and 3.
You can program up to 20 tracks for an Audio CD or 99 tracks for an MP3 you like.
• If you try to program more than the maximum number of tracks, “Full is displayed and the programming is refused. - To finish the program setting, and replay the program play, press the [▶Ⅱ] button.
Programmed replay of the track selected for Program 1 starts.
• Pressing the [ ■/AUTO] button also can finish the program setting.
• If you press the

To erase the program:
Turn off the power or select another source while CD/USB playback is stopped.
Repeat programmed replay:
Press the [P-MODE] button during programmed replay or pause of the CD/USB. Repeat replay of programmed tracks starts.
■ To remove a USB memory
- Select a source other than USB.
- Remove the USB memory from the [USB] terminal.
■ Preparation
For better reception, extend the FM wire antenna and direct it to the optimal direction where the sound quality is the best.
■ Tuning in to the FM station
- Press the[
- On the remote control: Press [FM] button. On the unit: Press [FUNCTION] button repeatedly to switch the source to “tuner” (Tuner).
• The device does not support AM broadcast. - Press the [10+/TUN+]/[10-/TUN-l button to tune
in the station.
Press and hold the [10+/TUN+]/[10-/TUN-] button to perform automatic tuning. Tuning stops automatically when a station is received.
• Automatic tuning may stop due to reception noise. In such a case, perform the automatic tuning again.
• When receiving a stereo radio broadcast, “ST” mark is displayed.
■ Pre-setting radio stations
You can preset up to 30 radio stations.
Automatic tuning preset
Press and hold the [ ■/AUTO] button. The device will automatically tune in and preset all of the stations that can be received in your
area.
Manual tuning preset
- Press the [10+/TUN+]/[10-/TUN-l button or press and hold the [10+/TUN+]/[10-/TUN-] button to select the desired station.
- Press the [PRG/MEMORY] button.
“P01u is displayed, and the preset number “P01n starts flashing.
• While the numbers are flashing, press the button to select the desired preset numbers you want to program. If you do not perform the operation within 5 seconds, the device will automatically return to the normal reception mode. - Press the [PRG/MEMORY] button again.
Preset number is lighting. The preset numbers will be preset. - If you preset other stations, repeat steps 1 through 3.
Select the preset radio stations
When radio signals are received, press the
- Each time you press the button, the Preset number and frequency of the radio station is displayed.
Listening to the external audio device
You can connect external audio device to this unit and output sound from the speaker.
• You can adjust the volume level.
- Press the[
- Connect an external audio device (such as mobile phone, digital audio player, etc.) to the unit.
• Use a connection cord with a ¢3.5 stereo mini-plug. - On the remote control: Press [LINE IN] button. On the unit: Press [FUNCTION] button repeatedly to switch the source to “Lines In” (Line In).
- Replay the external audio device.
- Adjust the volume with the [VOL] buttons on the remote control or Volume knob on the unit.
Maintenance
■ Maintenance of the main unit
Wipe off stain lightly with a soft cloth. If stain is severe, wipe it off with a cloth damped with neutral detergent solution and wrung tightly, and dry it with a dry cloth.
- Do not use benzene or thinner, etc. Do not spray any volatile chemical such as insecticide on the cabinet.
■ CD pickup (lens)
If the lens in the CD mount is stained, the CD may skip or cannot be played.
Blow the lens a few times with a commercially available blower, and remove the dust using the tip of a brush. To remove stains such as fingerprints, damp a cotton swab with commercially available lens cleaner, and wipe the lens lightly with it by drawing circles outward from the center.
When you suspect a failure

Notes
- If the device does not operate or display properly while the CD/USB ls played back, press the[
- The cabinet becomes slightly hot in some parts when the device has been used for a long period of time, it is not a failure.
Specifications

TOSHIBA LIFESTYLE ELECTRONICS TRADING CO.,LTD.
1-1-8, Sotokanda, Chiyoda-ku Tokyo 101-0021, Japan