Honeywell R-02701 Noise Isolating Earbuds Instructions


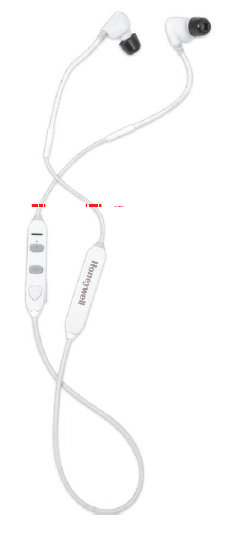
Honeywell R-02701 Noise Isolating Earbuds


POWERING ON/OFF
- Press and hold the POWER/BLUETOOTH BUTTON for 3 seconds and the INDICATOR LIGHTwillflash BLUE 3 times. At this stage, both the Bluetooth and Hearthrough are powered on.
- The earphone will then enter automatic pairing and the INDICATOR LIGHTwillflash RED and BLUE
- Enteryour Bluetooth settings on your device and connect earphone by choosing “HWBT”.
- Once connected, the INDICATOR LIGHT will illuminate BLUE and your earphone will be ready to use.
- If bluetooth connection is not detected in 5 minutes, the device will automatically power off. To Power back on, press and hold the POWER/BLUETOOTH BUTTON for 3 seconds. This power saving function is to ensure maximum operating time foryour device.
- Once you complete use of your earphones, press and hold the BLUETOOTH BUTTON for 3 seconds and the INDICATOR LIGHTwillflash RED 3 times. Your earphones are now turned off.
WHILE IN USE BLUETOOTH INSTRUCTIONS FOR CALLS
- Tap the BLUETOOTH BUTTON once to pick up or end calls.
- Tap the BLUETOOTH BUTTON twice to redial the last incoming or outgoing number.
- When there is another incoming call during a call, tap the BLUETOOTH BUTTON once to end the original call and receive a new call. Tap BLUETOOTH BUTTON twice to put the original call on hold and receive new call. Tap the BLUETOOTH BUTTON twice to alternate between the two calls.
BLUETOOTH INSTRUCTIONS FOR MEDIA
- Tap the BLUETOOTH BUTTON once to play/pause music
- Tap VOLUME UP/DOWN BUTTON once to increase/decrease media volume
- Press and hold the VOLUME UP/DOWN BUTTON for 2 seconds to skip to the previous/next track.
- Press and hold the BLUETOOTH BUTTON to activate SIRI/BIXBY/ALEXA etc … platforms
BATTERY CHARGING
- Insert USB-C charging cable to an AC charger (not included) or a computer USB port.
- insert the USB-C end into charge port.
- The charging indicator lights up RED while the unit is being charged. Once the battery is fully charged, the light willturn off.
- When charging with the earphone powered off, the earphone will automatically power on and start searching for a pairing device as soon as the USB-C chord is detached from the charging port.
- Battery charging time is approximately 2 hours.
FOAM TIP FITTING PROCEDURE
ALWAYS FIT AND SECURE EARTI PS WITH THE UNIT TURNED OFF.
STEP 1 The Honeywell In-Ear device is hearing protection and should not be fitted as an earpod for entertainment purposes. Proper fit is critical.
STEP 2. Start with smallest foam eartips for sizing. Compress the foam tip by rolling between fingers and quickly fit earbud with foam tip into the ear with the foam entering the ear canal. With the microphone opening toward the rear of the head and the lanyard wire forward and upward direction. Note the left and right markings on the inside of the earbud.

STEP 3. The earbud should be inserted into the ear canal such that the foam is inserted down the ear canal, not sitting loose in the earwell. If the earbud is loose in the ear canal, move to the next larger size tip. Make sure the tip is down the ear canal and not loose

STEP 4 The ear hook is bent to go around the ear and then behind to the other ear. This is for stability during movement. Care should be take to not letting the hard plastic strain relief press on ear or this will cause discomfort (the white piece in picture)
STEP 5. The earbud nested in the ear to keep bud inserted to proper depth for attenuation and lanyard around back of the head will achieve proper fit and performance. This is critcal for hearing protection.
STEP 5.2. If foam is too small and earbud moves around at all or does not dampen hand clapping, move to larger size foam, if foam is too large and earbud pushes out, then move to smaller size.


| |||||||||||||||||||||||||||||||||||||||||
The level of noise entering a person’s ear, when hearing protection is worn as directed, is closely approximated by the difference between the A-weighted environmental level and the NRR. Example: 1. The environmental noise level at the ear is 99 dB (A). The NRR is 29 decibels (dB). The level of noise entering the ear is approximately equal to 70 dB (A).
WARNING: The output of the electrical audio circuit of this hearing protection may exceed the daily limit sound level.
GUARANTEE: There is a one year guarantee against defect in material and workmanship. The guarantee does not cover damage caused by misuse, abuse, or unauthorised modifications. TO OBTAIN GUARANTEE the guarantee certificate must be properly filled in by the dealer and then sent in together with the faulty product.
If product enclosures are opened then it is not guaranteed the product will function as intended.
WARNING: For noise environments dominated by frequencies below 500Hz the C-weighted environmental noise level should be used. Improper fit of this device will reduce its effectiveness in
NOTE: This equipment has been tested and found to comply with the limits fora Class B digital device, pursuant to Part 15 of the FCC Rules. These limits are designed to provide reasonable protection against harmful interference in a residential installation. This equipment generates, uses and can radiate radio frequency energy and, if not installed and used in accordance with the instructions, may cause harmful interference to radio communications. However, there is no guarantee that interference will not occur in a particular installation.
CAUTION: The user is cautioned that changes or modifications not expressly approved by the party responsible for compliance could void the user’s authority to operate the equipment.
This device complies with Part 15 of the FCC Rules. Operation is subject to the following two conditions: (1) this device may not cause harmful interference, and (2) this device must accept any interference received, including interference that may cause undesired operation.
If this equipment does cause harmful interference to radio or television reception, which can be determined by turning the equipment off and on, the user is encouraged to try to correct the interference by one or more of the following measures:
- Reorient or relocate the receiving antenna.
- Increase the separation between the equipment and receiver.
- Connect the equipment into an outlet on a circuit different from that to which the receiver is connected.
- Consult the dealer or an experienced radio/TV technician for help.
FCC RADIATION EXPOSURESTATEMENT
This equipment complies with FCC radiation exposure limits set forth for an uncontrolled environment. This transmitter must not be co-located or operating in conjunction with any other antenna or transmitter
HONEYWELL SAFETY PRODUCTS
10 Thurber Blvd
Smithfield, RI 02917
Tel: 866.786.2353 Fax: 888.485.4342
@2021 Honeywell Safety Products
www.honeywellsafety.com
PN 50172440-001 Rev. B