Honeywell AreaRAE Pro Portable Gas Monitor User Guide


AreaRAE Pro & AreaRAE
Plus
QuickStart Guide

1349 Moffett Park Dr.
Sunnyvale, CA 94089 USA BC
www.raesystems.com

WARNINGS
Read Before Operating
The AreaRAE Pro/Plus User’s Guide must be carefully read by all individuals who have or will have the responsibility of using, maintaining, or servicing this product. The product will perform as designed only if it is used, maintained, and serviced in accordance with the manufacturer’s instructions.
CAUTION!
Never operate the monitor when the rear cover is removed. Remove rear cover, sensors, and/or battery only in an area known to be non-hazardous. Never use the instrument with the calibration adapter installed, as this can cause distorted readings, a potential safety threat.
Note: If the AreaRAE Pro/Plus is equipped with a gamma sensor, it comes pre-calibrated from the factory and no calibration is required.
User Interface
The user interface consists of the display and three keys, [Y/+], [MODE] and [N/-]. The LCD displays information such as monitored threats, real-time readings,
measurement units, alarm type (when in alarm, including cal. overdue), battery and pump status, datalog (if on), and radio and connection quality (if available).

Charging The AreaRAE Pro/Plus Always fully charge the battery before use.
- Remove the cover over the AreaRAE Plus/Pro’s power port.
- Plug the AC/DC adapter’s barrel plug into the AreaRAE Pro/Plus’ power port.
- Plug the AC/DC adapter into an AC outlet.

Replacing Battery Packs
The AreaRAE Pro/Plus is powered by a rechargeable Li-Ion battery pack (PN: W01-3007-100)
To change the battery:
- Unscrew battery.
- Lift out.
- Insert battery.
- Replace and tighten screws.

External Battery Charger
You can charge a spare Li-Ion battery with the optional External Li-Ion Battery Charger For AreaRAE. Attach it to the battery and then plug in its AC adapter.

Align the Charger’s edges and contact pins with the battery Press the Charger into place, making sure the contact pins mate

Press down on the back of the Charger to ensure that it is securely set Plugin the AC adapter’s barrel and plug the power cord into an AC source
Installing The Optional RAEMet Sensor
Align the RAEMet sensor with the socket, using the indexing key and notch as a guide, and press down. Turn the locking ring at the base to tighten until the sensor is firmly seated. Do not turn the top of the sensor.

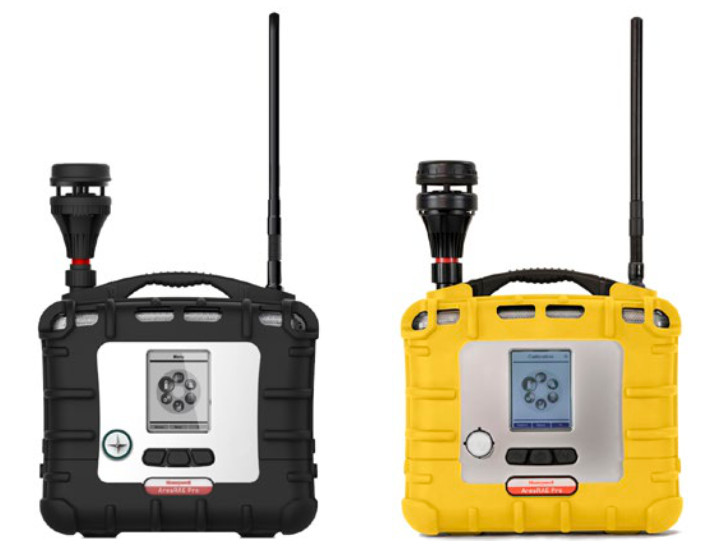
Installing The Antenna
Lift the rubber cover on the top of the AreaRAE Pro/Plus that protects the antenna port. Hold the base of the antenna and align it with the mating jack in the port. Then screw the antenna onto the jack until it is snug.

Turning The AreaRAE Pro/Plus On
With the instrument turned off, press and hold the [MODE] key until the audible alarm stops, and then release. During startup, the battery, buzzer, and LEDs are tested, and then it performs self-testing of its other functions. When the main measurement screen appears, the instrument is ready for calibration or use.
Note: When the battery’s charge falls below a preset voltage, the instrument warns you by beeping once and flashing once every minute, and the “empty battery” icon blinks on and off once per second. You should charge the battery or replace it with a fully charged battery before turning it on again.
Note: If Fast Startup is enabled on the instrument, fewer screens are shown during startup, compared to Normal Startup sequence.
Turning The AreaRAE Pro/Plus Off
Press and hold [MODE]. A 5-second countdown to shutoff begins. You must continue pressing on the key for the entire shutoff process. If you remove your finger from the key during the countdown, the shutoff operation is canceled and the instrument continues normal operation.
When the countdown ends and the screen displays “Unit Off,” release your finger from the [MODE] key. The AreaRAE Pro/Plus is now off.
Testing The Alarms
Under normal-operation mode and non-alarm conditions, the buzzer, LEDs, and backlight can be tested anytime by pressing [Y/+] once. If any alarm does not respond, check the Alarm Settings in Programming Mode to make sure all alarms are enabled. If any alarms are enabled but are not functional, do not use the instrument.
Glance Mode For Quick Information
Glance Mode allows you to get vital information without turning on the AreaRAE Plus/Pro. You can check information such as the instrument’s model and serial number, installed sensor types, wireless modules installed, etc. Glance Mode can be enabled/disabled via ProRAE Studio II on a connected PC.
Using Glance Mode
With the AreaRAE Plus/Pro turned off, press and hold [Y/+] to enter Glance Mode. Every screen is displayed in sequence as configured. Press [N/-] to advance to the next screen. The AreaRAE Plus/Pro exits Glance Mode and turns off when you press the [MODE] key. In addition, if you do not press either key in 60 seconds, the AreaRAE Plus/Pro automatically exits Glance Mode.
Bump Testing and Calibration Setup
Manually calibrate using a fixed-flow regulator (flow rate between 0.5 and 1.0 liters per minute) and the supplied special calibration adapter that covers the gas inlet:
- Connect the gas cylinder, flow regulator, and tubing (must use Teflon tubing for a PID sensor) to the instrument.
- With the instrument in Normal Mode, enter Programming Mode by pressing and holding both [MODE] and [N/-] until the password screen appears.
- Input the 4-digit password. (The default password is “0000.” If you do not know the password, select “Done.”) Then follow the menus to select single- or multi-sensor bump test, zero, or span calibration. Important! After a bump test or calibration, disconnect tubing (if used) to ensure correct readings.
Fresh Air Calibration
This procedure determines the zero point for all the sensors that require a zero calibration. For the oxygen sensor, Fresh Air calibration sets the point equal to the concentration of oxygen in ambient air (approximately 20.9% volume). To perform Fresh Air calibration on multiple sensors at the same time:
- Connect the instrument’s inlet to a source of dry, clean ambient air.
- At the Calibration Menu, select “Fresh Air.” Press [Y/+] once to enter the fresh air calibration sub-menu.
- Start the flow of dry zero air, if used.
- Press [Y/+] to start fresh air calibration.
- A countdown screen appears. You can abort the calibration at any time during the countdown by pressing [N/-].
- After completion, shut off the flow of zero air (if used) and remove any connected tubing.
Multi-Sensor Span Calibration
Depending on the configuration of your AreaRAE Plus/Pro and the span gas you have, you can perform a Span calibration simultaneously on multiple sensors.
The selected sensors are shown on the screen, along with the concentration settings for their Span gas. With calibration gas connected to the instrument, start a multi-span by applying gas to the instrument. Calibration should start after a few seconds. If not, press [Y/+]. If you do not want to perform a multi-span, press [MODE].
Note: You can abort a multi-span by pressing [N/-] once testing has started.
When the Multi-Span is done, a screen is shown, with the sensor names and either “Pass” or “Fail” shown next to them.
Single Sensor Zero Calibration
This allows you to perform zero (fresh air) calibration on individual sensors. Even though most toxic gas sensors can be zeroed in fresh air, some sensors such as a parts-per-billion PID sensor for volatile organic compounds (VOCs) should not be zeroed in the fresh air. VOCs are normally present in ambient air, so zeroing these sensors in the ambient air will not allow for a true zero to be set for such sensors. The parts-per-billion PID sensor should only be zeroed with zero air or in ambient air using a charcoal filter or a
VOC zeroing tube.
- If you are using a charcoal filter, connect it to the instrument.
- If you are using dry air, connect the instrument to a source of zero air.
- At the Calibration Menu, select “Single Sensor Zero.” Press [Y/+] once to enter the zero calibration sub-menu.
- Start the flow of zero air, if used.
- Press [Y/+] to start zero calibration.
- A countdown screen appears. You can abort the calibration at any time during the countdown by pressing [N/-].
- If the calibration is not aborted, the display shows the sensor names and tells you whether the zero calibration passed or failed, followed by the sensors’ zero calibration readings.
Multi-Sensor Bump
Depending on the configuration of your AreaRAE Plus/Pro and the span gas you have, you can perform a bump test simultaneously on multiple sensors.
The selected sensors are shown on the screen. With calibration gas connected to the instrument, start a multiple bump test by applying gas to the instrument and pressing [Y/+]. If you do not want to perform a multiple bump test, press [MODE].
Note: You can abort a multiple bump test by pressing [N/-] once testing has started.
When the Multi Bump test is done, a screen is shown, with the sensor names and either “Pass” or “Fail” shown next to them.
Operation Mode Navigation

Menus in Operation Mode are easy to step through by pressing the [N/-] key.
Notes:
- If the instrument is not equipped with a VOC sensor (PID), or is not equipped with an LEL sensor, then screens for those sensors (VOC Gas Status and LEL Gas Status, respectively) are not shown.
- If ISM or Wi-Fi is not the primary modem, its menu is not displayed.
- The first gray box indicates the datalog functions when data logging is in Manual mode. When data logging is in Automatic mode, this screen does not appear. Refer to the User’s Guide for information on selecting Automatic or Manual data logging.
- The dashed line indicates automatic progression.
The AreaRAE Plus/Pro has three keys:
Press any key when the backlighting is off to turn it on. A subsequent keypress is required to carry out an actual function corresponding to that key.

Single Sensor Span Calibration
Instead of performing a span calibration on multiple sensors simultaneously, you can select a single sensor and perform a span calibration.
Note: A calibration icon (bottle with bottom portion filled in) shown next to any sensor means it is due for a full calibration. To perform span calibration of an individual ensor:
- At the Calibration Menu, select “Single Sensor Span.”
- Select a sensor to calibrate from the list.
- Install the “T” tube and connect it to the calibration gas.
- Verify that the displayed calibration value meets the concentration specified on the gas cylinder.
- Start the flow of calibration gas.
- Press [Y/+] to start calibrating or wait for calibration to start automatically.
- A countdown screen appears. You can abort the calibration at any time during the countdown by pressing [N/-].
- If the calibration is not aborted, the display shows the sensor names and tells you whether the calibration passed or failed, followed by the sensor readings.
Note: If the instrument is equipped with a gamma radiation sensor, the sensor comes pre-calibrated from the factory and does not require routine calibration. However, you can check it by placing a check-source on the rear of the instrument equipped with a gamma sensor to check the readings. Place the check-source near the upper middle of the rear of the instrument and hold it until you see the Gamma reading change in the display.
Single Sensor Bump Test
This menu allows a bump test to be performed on an individual sensor of your choice.
Note: If a bump test icon (bottle with the bottom portion not filled in) is shown next to any of the sensors, it means that the sensor is due for a bump test.
To perform a bump test on an individual sensor, follow these steps:
- At the Calibration Menu, select “Single Sensor Bump.”
- Scroll down the list using [N/-], and then press [Y/+] to select a sensor to bump test.
- Install the “T” tube and connect it to a source of the calibration gas.
- Verify that the displayed calibration value meets the concentration specified on the gas cylinder.
- Start the flow of calibration gas.
- Press [Y/+] to start calibrating or wait for the bump test to start automatically.
- A countdown screen appears. You can abort the bump test at any time during the countdown by pressing [N/-].
If the bump test is not aborted, the display showsthe sensor names and tells you whether the bump test passed or failed, followed by the sensor readings.
Important!
After each sensor is bump tested, and you press “OK,” the next sensor in the menu list is highlighted.
LEL Calibration Procedure
You must perform a separate zero calibration for the LEL sensor and then perform a span calibration.
Important! Before calibrating, make sure pump is on its high setting. This is in the “Pump Speed” submenu under the “Monitor” menu item.
To calibrate the LEL sensor, follow these two procedures:
Zero Sensor Calibration For The LEL Sensor
- Turn on the AreaRAE Plus/Pro and allow it to warm up for 20 minutes in ambient air.
- In Programming mode, Select “Calibration” and then select “Single Sensor Zero.”
- Select “LEL.”
- Calibrate the LEL sensor’s zero point with ambient air.
- After zero calibration is complete, press [MODE] to return to the Calibration menu. “Single Sensor Span” is highlighted
Span Calibration For The LEL Sensor
- Press [Y/+] to select “Single Sensor Span.”
- Press [N/-] until “LEL Sensor” is highlighted.
- Press [Y/+] to select “LEL Sensor.”
- Screw one end of a “T” using Teflon tubing to the AreaRAE Plus/Pro filter on the inlet. (You can use RAE Systems P/N: W01-3003-000). Attach the other end to the flow regulator of a calibration cylinder with 50% LEL methane (unless otherwise specified ). The flow rate should not be less than 750cc/min.
- Start the flow of calibration gas.
- Press [Y/+] to start calibration.
- When calibration is complete, shut off the calibration gas flow and disconnect the calibration tubing.
- Press [MODE] to exit to the menu. (You may perform other calibrations. Otherwise, exit.)
Wireless Operation
Wireless settings are controlled via the Programming Mode menu items under “Wireless.” In order to save time while operating the instrument in a network, it is best to configure the settings before taking it into the field. Consult the User’s Guide for more detailed instructions.
- Enter Programming Mode by pressing and holding [MODE] and [N/-] simultaneously until the password screen appears.
- Input the 4-digit password. (The default password is “0000.” If you do not know the password, select “Done.”) Then follow the instructions for individual or multiple zero and span calibration.
- Press [N/-] repeatedly until “Wireless” is highlighted.
- Check that the radio is turned on, the PAN ID matches the PAN ID of the network, and matches the channel of the network, too. Select Join Network if a network is already established. You may also set the reporting interval and turn on the off-network alarm.
- When you are done with the settings, press [MODE] to go back to the programming screen, and [MODE] again to return to the main screen.
- Start the RAELink3 wireless modem and ProRAE Guardian on your computer. (If your computer has a built-in wireless modem, the RAELink3 modem is not necessary. Make sure the computer’s modem is on.)
- The antenna icon and signal-strength bars should be shown on the screen’s upper-left corner.
- Check that data is being received by ProRAE Guardian.

Note: If the AreaRAE Pro or AreaRAE Plus is equipped with Wi-Fi, and Wi-Fi is used as the primary radio instead of ISM, then a Wi-Fi access point substitutes for the RAELink3 Host.
SPECIAL CONDITIONS FOR SAFE USE
- The AreaRAE Plus/Pro shall only be fitted with RAE Systems Battery Pack type W01-3007-100.
- The instrument shall only be charged outside hazardous areas. No precautions against electrostatic discharge are necessary for portable equipment that has an enclosure made of plastic, metal, or a combination of the two, except where a significant static-generating mechanism has been identified.
Activities such as placing the item in a pocket or on a belt, operating a keypad or cleaning with a damp cloth, do not present a significant electrostatic risk. However, where a static-generating mechanism is identified, such as repeated brushing against clothing, then suitable precautions shall be taken, e.g., the use of anti-static footwear.
CERTIFICATIONS
Caution: Refer to the AreaRAE Pro/Plus User’s Guide for safety certification information.
Get The User’s Guide Online
Consult the AreaRAE User’s Guide for more detailed information.
www.raesystems.com or safety.honeywell.com

WARNING
ANY RAPID UP-SCALE READING FOLLOWED BY A DECLINING OR ERRATIC READING MAY INDICATE A GAS CONCENTRATION BEYOND THE UPPER SCALE LIMIT, WHICH MAY BE HAZARDOUS.
TOUTE LECTURE RAPIDE ET POSITIVE, SUIVE D’UNE BAISSE SUBITE AU ERRATIQUE DE LA VALEUR, PEUT INDIQUER UNE CONCENTRATION WARNING
To reduce the risk of ignition of hazardous atmospheres, recharge, remove, or replace the battery or sensors only in an area known to be non-hazardous!
ONLY THE COMBUSTIBLE GAS DETECTION PORTION OF THIS INSTRUMENT HAS BEEN ASSESSED FOR PERFORMANCE.
CAUTION:
HIGH OFF-SCALE READINGS MAY INDICATE AN EXPLOSIVE CONCENTRATION.
ATTENTION:
DES LECTURES HAUTES ET HORS D’ECHELLE PEUVENT INDIQUER DES CONCENTRATIONS DE GAZ INFLAMMABLES.
CAUTION: SUBSTITUTION OF COMPONENTS MAY IMPAIR INTRINSIC SAFETY.
CAUTION: BEFORE EACH DAY’S USAGE, THE SENSITIVITY OF THE LEL SENSOR MUST BE TESTED ON A KNOWN CONCENTRATION OF METHANE GAS EQUIVALENT TO 20 TO 50% OF FULL-SCALE CONCENTRATION. ACCURACY MUST BE WITHIN 0 AND +20% OF ACTUAL. ACCURACY MAY BE CORRECTED BY CALIBRATION PROCEDURE.
ATTENTION: AVANT CHAQUE UTILISATION JOURNALIERE, VERIFIER LA SENSIBILITE DU CAPTEUR DE LIE AVEC UNE CONCENTRATION CONNUE DE METHANE EQUIVALENTE DE 20 A 50% DE LA PLEINE ECHELLE. LA PRECISION DOIT ETRE COMPRISE ENTRE 0 ET 20% DE LA
VALEUR VRAIE ET PEUT ETRE CORRIGEE PAR UNE PROCEDURE D’ETALONNAGE.
Equipment that is intended for use in explosive atmospheres and which has been assessed and certified according to international regulations may be used only under specified conditions. The components may not be modified in any way.
The appropriate regulations for service and repair must be properly observed during such activities.
This instrument contains a connector for mounting of a wind sensor – RAEMet. This connector has a set of entity parameters that match the input entity parameters of RAEMet:
Uo: 5.2V; Po: 0.788W; Lo: 198μH; Co: 1000μF.
The solid-state relay connection is supplied with the following entity parameters, that must be complied with for external connections: Ui: 24V; Ii: 250mA.
Keep all ports covered when they are not in use.
This keeps moisture and debris out of the ports and contributes to the instrument’s intrinsic safety.
Note: Users are recommended to refer to ISARP12.13, Part II-1987 for general information on the installation, operation, and maintenance of combustible gas detection instruments. The AreaRAE Plus/Pro multi-gas monitor must be calibrated if it does not pass a bump test, or at least once every 180 days, depending on use and sensor exposure to poisons and contaminants.
FCC Part 15 Compliance
This device complies with Part 15 of the FCC Rules / Industry Canada license-exempt RSS standard(s). Operation is subject to the following two conditions: (1) this device may not cause harmful interference, and (2) this device must accept any interference received, including interference that may cause undesired operation.
Rev C April 2020
P/N: W01-4012-000